Benefits of Growing Plants from Seeds
When it comes to cultivating a thriving garden, starting from seeds offers a myriad of advantages that seasoned gardeners and beginners alike can appreciate. Let’s explore the compelling benefits of growing plants from seeds:
1. Cost-Effectiveness
Growing plants from seeds is a budget-friendly approach compared to purchasing mature plants. A packet of seeds typically contains numerous seeds, providing ample opportunities to cultivate multiple plants at a fraction of the cost.
2. Diverse Plant Selection
Seeds open up a world of possibilities with a vast array of plant varieties available for cultivation. From exotic flowers to heirloom vegetables, seeds allow you to curate a diverse and customized garden tailored to your preferences.
3. Educational Experience
Embarking on the journey of growing plants from seeds offers a valuable learning experience. Witnessing the entire growth cycle, from seed germination to plant maturity, provides insights into the intricate processes of nature and plant development.
4. Healthier Plants
Plants grown from seeds often develop stronger root systems compared to those transplanted as mature plants. This enhanced root growth leads to healthier, more resilient plants that are better equipped to withstand environmental stressors and thrive in various conditions.
5. Environmental Sustainability
Choosing to grow plants from seeds promotes environmental sustainability by reducing the carbon footprint associated with transporting mature plants. Additionally, starting from seeds minimizes the use of plastic pots and packaging commonly used for mature plant sales.
Embrace the art of growing plants from seeds and unlock a world of benefits that extend beyond your garden’s boundaries.
Cost-effectiveness
The Value of Cost-effectiveness in Plant Seed Growth
When embarking on the journey of growing plants from seeds, considering cost-effectiveness is crucial for a successful and sustainable gardening experience. By being mindful of expenses and resource allocation, you can optimize your investments and maximize the yield of your plant growth efforts.
Economical Seed Selection
Choosing affordable yet quality seeds is the cornerstone of cost-effectiveness in plant cultivation. Opt for seeds that align with your budget while ensuring they are from reputable sources to guarantee successful germination and growth.
Utilizing Available Resources Efficiently
Maximizing the use of available resources such as soil, water, and sunlight can significantly impact the cost-effectiveness of your plant growth endeavors. By strategically managing these resources, you can minimize waste and reduce unnecessary expenses.
DIY Approaches to Reduce Costs
Implementing do-it-yourself techniques like creating your own compost, seed-starting containers, or plant supports can help cut down on expenses while fostering a sense of self-sufficiency in your gardening practices.
Quotes to Remember
“In gardening, the cheapest plant is the one you grow yourself.”– Author Unknown
Plant Variety
Understanding Plant Varieties
When it comes to growing plants from seeds, choosing the right plant variety is crucial. Each plant variety has its own unique characteristics, including growth patterns, flowering times, and environmental preferences.
Factors to Consider
- Climate: Consider the climate of your region and choose plant varieties that thrive in your specific conditions.
- Space: Take into account the space you have available for gardening and select plant varieties that suit your space limitations.
- Time: Some plant varieties require more time and attention than others, so choose based on the time you can dedicate to your garden.
Popular Plant Varieties
Here are some popular plant varieties that are great for beginners:
| Plant Variety | Characteristics |
|---|---|
| Tomatoes | Easy to grow, high yield |
| Sunflowers | Tall, bright blooms |
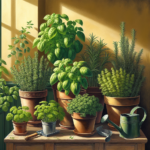
| Basil | Aromatic, culinary uses |
Experimenting with New Varieties
Don’t be afraid to experiment with new plant varieties in your garden. It can be a rewarding experience to try growing plants you’ve never planted before, expanding your gardening skills and knowledge.
Educational Experience
Formal Education
My educational journey has been a cornerstone in my growth and development. Each stage, from primary school to higher education, has equipped me with essential knowledge and a solid foundation for my career.
Professional Training
Continuing education and professional development have been integral in honing my skills and keeping me abreast of the latest trends and advancements in my field. Lifelong learning is a key principle that I uphold.
Hands-On Experience
Complementing my formal education, hands-on experience has provided me with practical insights and a deeper understanding of real-world applications. This practical knowledge is invaluable to me.
Collaborative Projects
Engaging in collaborative projects has not only expanded my network but also enriched my learning experience. Working with diverse teams has broadened my perspective and fostered creativity.
Understanding Seed Types
When it comes to growing plants from seeds, understanding the different types of seeds available is crucial. Each seed type has its own characteristics and requirements for successful germination and growth.
1. Open-Pollinated Seeds
Open-pollinated seeds are seeds that are pollinated naturally by birds, insects, wind, or other natural mechanisms. These seeds produce plants that are true to the parent plant, making them a reliable choice for saving seeds from year to year.
2. Heirloom Seeds
Heirloom seeds are open-pollinated seeds that have been passed down through generations. These seeds often have a rich history and unique traits, making them popular among gardeners looking to preserve genetic diversity.
3. Hybrid Seeds
Hybrid seeds are created by cross-pollinating two different varieties to produce a new hybrid plant. These seeds can have specific traits like disease resistance or higher yields, but they may not reproduce true to the parent plant if saved for future planting.
4. Organic Seeds
Organic seeds come from plants grown without synthetic pesticides or fertilizers. Choosing organic seeds ensures that your garden starts with a foundation of healthy, chemical-free plants.
5. Pelleted Seeds
Pelleted seeds have a coating of inert material to make them larger and easier to handle. These seeds are often used for small seeds that are difficult to sow individually, helping improve accuracy and efficiency during planting.
6. Treated Seeds
Treated seeds have been coated with fungicides, insecticides, or other treatments to protect them from pests and diseases. While this can be beneficial in certain situations, it’s essential to handle treated seeds with care and follow any safety instructions provided.
By understanding the characteristics of different seed types, you can choose the best seeds for your garden and set yourself up for a successful growing season.
Open-pollinated Seeds
Open-pollinated seeds are a treasure trove of biodiversity, offering a plethora of benefits for both the garden and the gardener. Let’s delve into the world of open-pollinated seeds and uncover their wonders.
The Essence of Open-Pollination
Open-pollinated seeds are the result of natural pollination methods, including the wind, insects, birds, and other natural mechanisms. This ensures a diverse genetic makeup, leading to stronger and more resilient plants.
Key Characteristics
- Genetic Stability: Open-pollinated seeds produce plants that closely resemble the parent plant, ensuring consistency in traits.
- Adaptability: These seeds adapt well to local climate and soil conditions, thriving in various environments.
- Sustainability: By saving seeds from open-pollinated plants, gardeners can perpetuate a cycle of self-sufficiency and sustainability.
Benefits for Gardeners
Cultivating plants from open-pollinated seeds offers numerous advantages:
- Diverse Flora: Experience a rich array of plant variations, each with its unique charm and characteristics.
- Cost-Effective: Save money in the long run by collecting and sowing seeds from your own garden.
- Support Biodiversity: Contribute to preserving biodiversity by nurturing a range of plant species.
Preservation of Heritage
Open-pollinated seeds play a crucial role in conserving heirloom varieties, ensuring that these time-honored plants continue to grace our gardens for generations to come.
Final Thoughts
Embrace the beauty and benefits of open-pollinated seeds in your gardening endeavors. Their intrinsic value lies not just in the plants they yield, but in the connection they foster with nature’s intricate processes.
Hybrid Seeds
Hybrid seeds are the result of cross-pollination between different varieties of plants. These seeds are carefully created to exhibit specific traits that are desirable to gardeners and farmers alike. Understanding hybrid seeds and how they can benefit your garden is essential for successful plant cultivation.
Benefits of Hybrid Seeds
- Hybrid seeds often have increased yields compared to traditional seeds.
- Hybrids can be more resistant to diseases and pests, reducing the need for chemical interventions.
- These seeds are bred for specific traits such as size, color, and taste, ensuring consistent quality.
Factors to Consider
When choosing hybrid seeds for your garden, consider the following:
- Climate: Select hybrids that are well-suited to the climate of your region.
- Soil Conditions: Choose seeds that thrive in the type of soil you have in your garden.
- Growth Requirements: Be aware of the sunlight, water, and space requirements of the plants.
Common Misconceptions
Some gardeners believe that hybrid seeds are genetically modified, but in reality, they are produced through natural cross-breeding methods.
Hybrid Seed Availability
Hybrid seeds are readily available from nurseries, garden centers, and online suppliers. It’s essential to purchase seeds from reputable sources to ensure their quality and authenticity.
Expert Tip
When planting hybrid seeds, follow the instructions on the packet carefully to maximize their growth potential.
Heirloom Seeds
Heirloom seeds are a treasured link to our past, embodying history, flavor, and resilience in each tiny package. Discover the wonders of heirloom seeds and how they can enrich your gardening experience.
The Beauty of Heirloom Seeds
Heirloom seeds are open-pollinated varieties that have been passed down through generations, carefully preserved for their unique traits and heritage. These seeds offer a glimpse into the past, telling stories of diverse cultures and forgotten flavors.
Why Choose Heirloom Seeds?
- Biodiversity: Heirloom seeds promote plant diversity, preserving rare and endangered varieties that are disappearing in modern agriculture.
- Flavor: Experience unparalleled taste with heirloom fruits and vegetables, each variety offering distinct, rich flavors.
- Adaptability: Heirloom seeds have adapted to various growing conditions over the years, making them resilient and well-suited for different climates.
- Sustainability: By saving and sharing heirloom seeds, you contribute to the conservation of agricultural heritage and promote sustainable gardening practices.
Start Your Heirloom Garden
Embrace the tradition and diversity of heirloom seeds by starting your own heirloom garden. Whether you have a spacious backyard or a few pots on a balcony, you can cultivate a piece of history and enjoy the rewards of growing these unique varieties.
Remember, each heirloom seed carries a story, waiting to be unfolded in your garden.
Seed Starting Essentials
Starting plants from seeds is a rewarding and essential part of gardening. By following these seed starting essentials, you can ensure a successful and bountiful garden.
Quality Seeds
- Choose reputable sources: Select seeds from trusted suppliers known for their high-quality products.
- Check the expiration date: Ensure the seeds are fresh and viable for optimal germination.
Proper Containers
Use containers that provide adequate drainage to prevent waterlogging, such as seedling trays or peat pots.
Quality Potting Mix
Opt for a well-draining seed starting mix that is lightweight and sterile to prevent diseases.
Optimal Watering
Ensure seeds are consistently moist but not waterlogged. Use a spray bottle or gentle watering can to avoid disturbing delicate seeds.
Warmth and Light
Place seeds in a warm and well-lit location. Consider using a heat mat to maintain consistent temperature for germination.
Patience and Monitoring
Be patient as seeds germinate at different rates. Regularly monitor moisture levels, light exposure, and seedling growth.
Transplanting Care
- Harden off seedlings: Gradually expose seedlings to outdoor conditions before transplanting them into the garden.
- Handle seedlings delicately: Transplant with care to avoid damaging the delicate roots and stems.
Choosing the Right Containers
Consider the Size
When selecting containers for your plants, consider the size of both the mature plant and the container itself. Ensure that the container is large enough to accommodate the plant’s roots and has ample room for growth.
Drainage is Key
Proper drainage is crucial for the health of your plants. Look for containers with multiple drainage holes to prevent water from pooling and causing root rot.
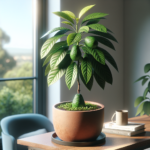
Material Matters
The material of the container can impact the plant’s well-being. Terra cotta pots are porous and allow for air circulation, while plastic containers retain moisture well. Choose the material based on your plant’s watering needs.
Choose Aesthetically Pleasing Options
Containers come in a variety of styles and colors. Select containers that complement your space and add to the overall visual appeal of your garden.
Repurposing Containers
Get creative and repurpose old containers for your plants. Just ensure they are clean and have adequate drainage before planting to promote healthy growth.
Consider Container Weight
Keep in mind the weight of the container, especially for larger plants. Opt for lightweight containers if you plan on moving them frequently.
Selecting Quality Seed Starting Mix
When it comes to starting plants from seeds, the quality of your seed starting mix plays a crucial role in the success of your gardening endeavors. Here are some key considerations to keep in mind when selecting the right seed starting mix:
1. Check the Ingredients
Look for high-quality organic ingredients in your seed starting mix. A good mix should ideally contain a blend of ingredients such as coco coir, peat moss, vermiculite, and perlite to provide a balanced environment for seeds to germinate.
2. Texture Matters
The texture of the seed starting mix is essential for seed germination. Opt for a mix that is lightweight, well-draining, and fine to allow delicate seed roots to penetrate easily and promote healthy growth.
3. Sterilization
Ensure that the seed starting mix has been sterilized to eliminate any harmful pathogens or weed seeds that could hinder the growth of your plants. Sterilized mixes provide a clean environment for seeds to sprout without competition.
4. Moisture Retention
Proper moisture retention is crucial for seed germination. A good seed starting mix should be able to retain moisture while also allowing excess water to drain away, preventing issues such as root rot.
5. Nutrient Content
While seeds contain initial nutrients for sprouting, a balanced nutrient content in the seed starting mix can support the seedlings as they grow. Consider mixes that include organic fertilizers to provide essential nutrients for healthy plant development.
By paying attention to these factors and selecting a quality seed starting mix, you set the foundation for successful seed germination and robust plant growth.
Providing Adequate Water and Light
Proper care in providing water and light is crucial for the successful growth of plants from seeds. Understanding the balance and requirements of these essential elements will significantly impact the health and development of your plants.
Adequate Watering Techniques
- Consistent Moisture: Seeds require consistent moisture to germinate successfully. Avoid overwatering, which can lead to fungal growth and damping off.
- Water Quality: Use room temperature water to prevent shocking the seeds or seedlings. Avoid softened water, as the salts can harm young plants.
- Drainage: Ensure proper drainage in your planting containers to prevent waterlogged soil, which can suffocate roots and lead to root rot.
- Monitoring: Regularly check the moisture level in the soil by inserting your finger into the soil. Water when the top layer feels dry but avoid letting the soil completely dry out.
Optimizing Light Exposure
Light is essential for photosynthesis, the process through which plants produce energy for growth. Adequate light exposure is vital for healthy seedling development.
- Direct Sunlight: Place your seedlings in an area that receives adequate sunlight, preferably near a south-facing window or under grow lights if natural light is limited.
- Duration: Most seedlings require around 12-16 hours of light per day. Monitor and adjust the exposure based on the plant’s response.
- Intensity: Ensure the light source is intense enough to support growth. Monitor the distance between the light and the plants to prevent leggy growth.
- Light Quality: Different plants have varying light requirements. Research the specific needs of the plants you are growing to provide the appropriate light spectrum.
By understanding and implementing proper watering techniques and optimizing light exposure, you pave the way for robust growth and flourishing plants from seeds.
Germination Process
The Miracle of Germination
Germination is a miraculous process where a seed transforms into a plant, brimming with life and potential. Understanding this essential stage is crucial for every aspiring gardener.
Key Stages of Germination
- Seed Absorption: The seed absorbs water, initiating metabolic processes.
- Radicle Emergence: The radicle, or primary root, sprouts from the seed.
- Root and Shoot Growth: Roots delve into the soil while shoots reach for the sun.
- Leaf Development: The seedling develops its first leaves, essential for photosynthesis.
Optimal Conditions for Germination
For successful germination, seeds require moisture, ventilation, temperature stability, and light based on the plant’s specific needs. Each species may have unique requirements.
Common Mistakes to Avoid
- Over-Watering: Excess water can lead to rot and hinder oxygen absorption.
- Improper Depth: Planting seeds too deep or shallow can impede germination.
- Incorrect Temperature: Extreme temperatures can delay or prevent germination.
Quote to Remember
“In every seed lie the components of a fully grown tree. A tiny seed can house a mighty future.” – Leslie Parrott
Seed Preparation Techniques
Preparing seeds before planting is a crucial step that greatly influences the success of your gardening endeavors. By following proper seed preparation techniques, you can improve germination rates and ensure robust plant growth. Let’s delve into some essential methods to effectively prepare your seeds for cultivation.
Seed Scarification
Seed scarification is a method that involves breaking or softening the seed coat to promote quicker and more uniform germination. This technique is especially beneficial for seeds with hard coats, such as beans, peas, and morning glories. You can scarify seeds by gently nicking the seed coat with a knife or rubbing them lightly with sandpaper. This process helps water penetrate the seed more easily, kickstarting the germination process.
Seed Soaking
Another useful technique is seed soaking, which entails immersing seeds in water for a specified period before planting. Soaking can help soften the seed coat and jumpstart germination by triggering metabolic processes within the seed. Different seeds require varying soaking times, so it’s essential to research the specific requirements for the seeds you are planting.
Seed Stratification
Seed stratification is a process that mimics the natural conditions seeds would experience in their native environment during winter. This technique is common for plants that require a cold period to break dormancy. To stratify seeds, you can place them in a moist medium such as sand or peat moss and store them in the refrigerator for a few weeks. This cold treatment prompts the seeds to germinate when planted, enhancing their overall vitality.
By incorporating these seed preparation techniques into your planting routine, you can set the stage for healthy seedlings and bountiful harvests. Remember to adapt these methods to suit the specific requirements of your seeds and enjoy the rewarding process of watching your plants grow from tiny seeds into flourishing specimens.
Optimal Germination Conditions
Creating the perfect environment for your seeds to germinate is crucial for successful plant growth. By understanding and providing the optimal germination conditions, you can enhance the chances of strong and healthy seedlings.
Light Exposure
Light: Indirect sunlight is ideal for most seeds as direct sunlight can cause overheating and hinder germination. Ensure that your seeds receive enough light but are not exposed to harsh, direct rays.
Temperature Regulation
Warmth: Most seeds germinate best in a warm environment. Maintain a consistent temperature range depending on the type of seed you are planting. Consider using a heating mat to regulate the warmth if needed.
Moisture Levels
Water: Keep the soil consistently moist but not waterlogged. Over-watering can lead to rot and fungal issues. Use a spray bottle or gentle watering method to provide moisture without disturbing the seeds.
Soil Quality
Quality: Choose a well-draining, nutrient-rich soil mix for your seeds. Avoid compacted or poor-quality soil that can impede germination. Consider adding organic matter to enhance soil fertility.
Air Circulation
Ventilation: Good air circulation is essential for preventing mold and encouraging healthy seedlings. Place a fan on a low setting near your seed trays to promote airflow without causing damage.

Monitoring and Patience
Observation: Regularly check the moisture levels, temperature, and growth progress of your seeds. Patience is key during the germination process as some seeds may take longer to sprout than others. Avoid disturbing the seeds once planted.
By providing the optimal conditions for your seeds to germinate, you set the foundation for healthy plant development and a successful gardening experience.
Troubleshooting Common Germination Issues
Potential Causes of Germination Problems
- Improper Temperature: Ensure the seeds are in an environment with the correct temperature for germination.
- Inadequate Moisture: Seeds may fail to sprout if they are too dry or too soggy.
- Poor Soil Conditions: The soil may lack essential nutrients or have poor drainage.
- Old or Low-Quality Seeds: Using outdated or inferior seeds can impact germination rates.
Signs of Germination Issues
If you notice delayed sprouting, inconsistent germination, or unhealthy seedlings, it may indicate underlying germination problems.
Addressing Germination Challenges
- Check Seed Quality: Purchase seeds from reputable sources and ensure they are fresh.
- Optimize Growing Conditions: Adjust moisture levels, lighting, and temperature as needed.
- Provide Proper Care: Follow planting instructions carefully and attend to seedlings with gentle care.
Quoting Expert Advice
“Successful germination is a delicate process that requires attention to detail and patience.”
Caring for Seedlings
Optimal Conditions
Ensure your seedlings are placed in an area with ample sunlight and consistent, gentle moisture levels. Avoid direct sunlight for extended periods to prevent scorching.
Watering
Water your seedlings carefully, aiming to keep the soil consistently damp but not waterlogged. Overwatering can lead to root rot, so observe the moisture levels closely.
Temperature Control
Maintain a stable temperature for your seedlings, avoiding extreme fluctuations that can stress the delicate plants. A warm, consistent environment is crucial for healthy growth.
Transplanting
When your seedlings have developed a strong root system and several sets of leaves, they are ready for transplanting into larger containers or the garden. Handle them carefully to avoid damaging the roots.
Fertilizing
Once your seedlings have established themselves, consider introducing a mild fertilizer to support their growth. Be cautious not to over-fertilize, as this can harm the delicate plants.
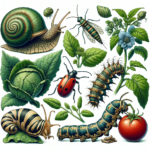
Pest Control
Regularly inspect your seedlings for any signs of pests or disease. Act promptly to address any issues, using organic pest control methods whenever possible to protect your plants and the environment.
Temperature and Humidity Considerations
Proper temperature and humidity levels are crucial factors in successfully growing plants from seeds. Understanding how these elements affect seed germination and plant growth is essential for any budding gardener.
Temperature Requirements
Each plant species has its own temperature preferences for germination. It’s important to research the specific temperature range required for the seeds you are planting.
- Warm-season seeds: These seeds generally require higher temperatures, typically between 70°F to 85°F, to germinate successfully.
- Cool-season seeds: Seeds that thrive in cooler temperatures usually germinate best at around 55°F to 65°F.
- Temperature fluctuations: Avoid drastic fluctuations in temperature, as they can negatively impact seed germination and overall plant health.
Humidity Levels
Humidity plays a vital role in seed germination by keeping the seeds adequately hydrated. Here are some key points to consider:Seed Moisture: Seeds need consistent moisture levels to germinate. Ensure the planting medium is moist but not waterlogged. Humidity Control: Monitor humidity levels in the germination area using a hygrometer. Aim for a humidity range of 50% to 70% for most seeds. Ventilation: Proper ventilation is crucial to prevent excess humidity and the risk of fungal diseases. Ensure good air circulation around the growing area.
By paying close attention to both temperature and humidity levels, you can create an optimal environment for seed germination and seedling growth. Remember, consistency is key in nurturing your plants from seed to maturity.
Transplanting Seedlings
Transplanting seedlings is a crucial step in the growth journey of your plants. Ensuring a smooth transition for your young seedlings is essential for their future development and overall health.
Timing is Key
Transplant your seedlings when they have developed their first true leaves and have outgrown their current containers. This typically occurs when the seedlings are 2-3 inches tall.
Preparation Steps
- Prepare the Soil: Use a well-draining potting mix suitable for the specific type of plant you are transplanting.
- Water the Seedlings: Hydrate the seedlings before transplanting to help reduce stress during the process.
- Choose the Right Containers: Select containers that provide ample space for the roots to grow and have drainage holes to prevent waterlogging.
Transplanting Process
- Gently Remove Seedlings: Carefully loosen the soil around the seedlings to avoid damaging the roots.
- Planting Depth: Ensure that the seedlings are planted at the same depth as they were in their previous containers.
- Watering After Transplanting: Water the seedlings immediately after transplanting to help settle the soil around the roots.
Caring for Transplanted Seedlings
After transplanting, provide the seedlings with adequate sunlight, water, and nutrients to support their growth. Monitor them closely for any signs of stress and address any issues promptly to promote healthy development.
Fertilizing Seedlings
Proper fertilization plays a vital role in nurturing healthy seedlings, providing essential nutrients for robust growth. Understanding the fundamentals of fertilizing seedlings can significantly impact their development and overall health.
Choosing the Right Fertilizer
When selecting a fertilizer for your seedlings, opt for a balanced formula specifically designed for young plants. Look for fertilizers with high levels of phosphorus to promote root development and nitrogen for green foliage growth.
When to Fertilize
It is essential to fertilize seedlings at the appropriate stage of growth to avoid nutrient deficiencies or overfeeding. Begin fertilizing after the seedlings develop their first set of true leaves, typically 2-4 weeks after germination.
Application Techniques
Apply fertilizer diluted to half the recommended strength to prevent burning delicate seedlings. Water the seedlings thoroughly before fertilizing to ensure proper absorption of nutrients.
Frequency of Fertilization
For most seedlings, fertilize once a week to provide a consistent supply of nutrients for steady growth. Monitor the plants for any signs of nutrient deficiencies and adjust the fertilization schedule accordingly.
Additional Tips
- Always follow the manufacturer’s instructions when fertilizing seedlings.
- Avoid overfertilizing, as it can harm the delicate roots of young plants.
- Consider using organic fertilizers for a natural and gentle approach to feeding seedlings.
Transitioning to the Garden
As you prepare to move your seedlings from the controlled environment of your indoor setup to the great outdoors, there are essential steps and considerations to ensure a successful transition for your plants. The process of acclimating your young plants to the changing conditions is crucial for their growth and overall health.
Choosing the Right Time
Timing is key when transitioning your plants to the garden. Make sure to consider the local climate and weather patterns. Wait until all risk of frost has passed and the soil has warmed up adequately before moving your seedlings outside. This will give them the best chance to thrive in their new environment.
Hardening Off
Hardening off is the practice of gradually exposing your plants to outdoor conditions to toughen them up before transplanting. This process helps prevent shock and stress to the plants. Start by placing the seedlings outdoors for a few hours a day in a sheltered spot, gradually increasing the time and exposure to sunlight and wind over a period of 7-10 days.
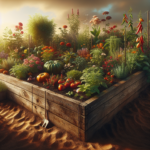
Preparing the Soil
Ensure the garden bed is prepared and ready to receive your seedlings. Amend the soil with organic matter to provide essential nutrients and improve drainage. Clear the area of any weeds and debris that may compete with your plants for resources.
Transplanting with Care
When transplanting your seedlings, handle them gently to avoid damaging the roots. Plant them at the same depth as they were in their containers and water them thoroughly to help them settle into their new home. Consider using mulch to retain moisture and suppress weeds around the plants.
Monitoring and Care
Keep a close eye on your newly transplanted seedlings in the garden. Watch for signs of stress such as wilting or yellowing leaves and adjust your care routine accordingly. Provide adequate water as needed and protect the plants from pests and extreme weather conditions.
By following these steps and giving your seedlings the attention they need during the transition to the garden, you set the foundation for a successful growing season ahead.
Hardening Off Seedlings
Hardening off seedlings is a crucial step in the journey of young plants towards outdoor life. This process helps them acclimate to the harsher conditions outside, preparing them for transplanting into the garden. Here’s a comprehensive guide to assist you in this transitional phase.
Understanding Hardening Off
- What is Hardening Off? Hardening off is the gradual process of exposing indoor seedlings to outdoor conditions to toughen them up before planting them in the garden.
- Importance of Hardening Off: This technique helps prevent transplant shock, sunburn, and stunted growth by allowing seedlings to adjust gradually.
How to Harden Off Seedlings
Follow these steps to successfully harden off your seedlings:
- Start Early: Begin the hardening-off process about 7-10 days before you plan to transplant your seedlings.
- Gradual Exposure: Place seedlings outdoors in a sheltered spot for a few hours each day, gradually increasing their time outside.
- Protect from Harsh Elements: Avoid exposing seedlings to extreme weather conditions initially. Shield them from strong winds, direct sunlight, and heavy rains.
- Monitor Progress: Observe your seedlings closely for any signs of stress such as wilting or yellowing leaves. Adjust the exposure time accordingly.
Tips for Successful Hardening Off
“Patience and consistency are key when hardening off seedlings. Rushing this process can do more harm than good.”
Here are some additional tips to enhance your hardening-off experience:
- Choose the Right Time: Pick a period with mild weather conditions for the best results.
- Water Wisely: Keep seedlings well-hydrated during the hardening-off period to prevent stress.
- Observe and Adapt: Pay attention to how your seedlings respond to outdoor conditions and adjust the process as needed.
Planting Seedlings in the Garden
When it’s time to transplant your seedlings from pots to the garden, there are crucial steps to follow to ensure their successful growth and development. Proper planting techniques play a significant role in establishing healthy plants that will thrive in your garden.
Choosing the Right Spot
Before planting your seedlings, carefully select the appropriate spot in your garden. Consider factors such as sunlight exposure, soil quality, and spacing requirements for the particular plant species.
Preparing the Soil
Prepare the garden bed by loosening the soil to improve aeration and drainage. Adding organic matter such as compost will enrich the soil and provide essential nutrients for your seedlings’ growth.
Transplanting Seedlings
When transplanting, handle the seedlings gently by their leaves to avoid damaging the delicate stems. Dig a hole slightly larger than the root ball and place the seedling into the hole, ensuring it sits at the same level as it did in the pot.
Watering and Mulching
After planting, water the seedlings thoroughly to help them establish their roots in the new environment. Applying a layer of mulch around the plants will help conserve moisture and prevent weed growth.
Maintaining the Seedlings
Monitor the seedlings regularly for any signs of stress, pests, or diseases. Provide appropriate support such as stakes for tall plants to prevent them from bending or breaking in strong winds.
Quotes:
“The art of planting seedlings lies in fostering their growth with care and attention, allowing them to flourish and brighten your garden.”
By following these planting guidelines, you set your seedlings on the path to thriving in their new garden home.
Maintenance Tips for Young Plants
As your young plants continue to grow, proper maintenance is crucial to ensure their healthy development. Follow these essential tips to help your plants thrive:
1. Watering
Provide consistent and adequate water to your young plants. Avoid overwatering, as it can lead to root rot, but do not let the soil dry out completely.
2. Light Exposure
Place your plants in an area with appropriate sunlight exposure based on their specific needs. Monitor their growth to determine if they are receiving enough light.
3. Nutrient Supply
- Use a balanced fertilizer to provide essential nutrients to your plants.
- Follow the recommended feeding schedule for young plants to support their growth.
4. Pruning and Training
Regularly prune your young plants to encourage bushier growth and remove any damaged or unhealthy parts. Consider training techniques to shape your plants as they grow.
5. Pest Control
Keep an eye out for any signs of pests or diseases on your plants. Early detection is key to preventing infestations. Use organic pest control methods whenever possible.
6. Support Systems
Provide appropriate support for your growing plants, such as stakes or trellises for climbing varieties. This will help prevent damage and promote upward growth.
7. Environmental Conditions
Remember, each plant has its own ideal environment requirements. Ensure the temperature, humidity, and airflow are suitable for the specific plant species you are growing.
Saving Seeds for Future Planting
When it comes to gardening, saving seeds from your plants can be a cost-effective and rewarding way to ensure a bountiful harvest in the future. By properly storing and caring for your seeds, you can maintain the genetic diversity of your plants and pass on your favorites to the next growing season.
How to Save Seeds
To save seeds successfully, it’s crucial to start with healthy, vigorous plants. Here are some general steps to help you save seeds for future planting:
- Choose the Right Seeds: Select seeds from open-pollinated or heirloom plants, as these will produce offspring true to the parent plant.
- Harvest at the Right Time: Allow the plant’s seeds to fully mature on the vine or stalk before harvesting.
- Clean and Dry: Remove any debris or flesh from the seeds and allow them to dry completely.
- Store Properly: Store seeds in a cool, dry place in airtight containers to protect them from moisture and pests.
Common Plants for Seed Saving
While most plants produce seeds that can be saved for future planting, some popular choices include:
- Tomatoes
- Peppers
- Beans
- Lettuce
Seed Saving Tips
Here are some additional tips to keep in mind when saving seeds:
“When saving seeds, label them clearly with the plant’s name and the date they were harvested to avoid confusion.”
Remember that not all plants are suitable for seed saving, so it’s essential to research the specific requirements of each plant you wish to save seeds from. With proper care and attention, you can build a seed collection that will provide you with years of fruitful harvests.
Harvesting and Storing Seeds
When to Harvest Seeds
Harvesting seeds at the right time is crucial for successful plant propagation. Here are some guidelines:
- Timing: Collect seeds when they are fully matured and dry on the plant.
- Morning Harvest: Optimal time is usually in the morning after the dew has dried but before the heat of the day.
Seed Harvesting Techniques
Use proper techniques to ensure seed viability and quality:
- Hand-Picking: Gently remove seeds from the plant by hand to avoid damage.
- Netting: Cover seed pods with a net or bag to catch seeds as they naturally disperse.
Seed Storage Tips
Proper seed storage is essential for maintaining seed viability over time:
- Container: Store seeds in a cool, dry place in a breathable container such as a paper envelope or glass jar.
- Labeling: Clearly label each seed type with the plant name and collection date for future reference.
Seed Viability and Testing
Check seed viability before planting to ensure germination success:
- Viability Test: Conduct a simple seed viability test by placing a few seeds in a damp paper towel to see if they germinate.
- Germination Rate: Keep track of the germination rate to assess seed quality over time.
Seed Viability Tips
Sowing seeds is an exciting and rewarding endeavor, but ensuring seed viability is crucial for successful plant growth. Here are some tips to help you maximize the potential of your seeds:
1. Seed Storage
Proper storage is key to maintaining seed viability. Keep seeds in a cool, dry place away from sunlight to prevent premature germination or decay.
2. Labeling and Organization
Label each seed packet with the plant type, variety, and date of collection. Organizing seeds in a systematic manner will help you track their viability and planting schedule.
3. Perform a Germination Test
Before sowing seeds in bulk, conduct a germination test by planting a few seeds in a small container with appropriate soil and monitoring their sprouting rate. This test will give you an idea of the overall viability of the seed batch.
4. Seed Scarification
Some seeds have hard coatings that inhibit germination. Consider scarifying these seeds by gently rubbing them with sandpaper or soaking them in water to improve germination rates.
5. Optimal Planting Conditions
Ensure seeds are planted at the appropriate depth and spaced according to the plant’s requirements. Providing adequate moisture, light, and temperature will support successful germination and seedling growth.
6. Monitoring and Adjustment
Regularly check seed trays or beds for signs of germination. Adjust watering and lighting conditions based on the seedlings’ growth progress to promote healthy development.
By following these seed viability tips, you can increase the likelihood of successful seed germination and enjoy a bountiful garden filled with thriving plants.
Seed Saving Benefits
When it comes to gardening, the act of saving seeds offers a plethora of benefits that extend far beyond the immediate growth of new plants. Let’s explore the numerous advantages that seed saving brings to both the environment and the gardening community.
Preservation of Biodiversity
Seed saving plays a crucial role in preserving the rich tapestry of plant varieties that exist in nature. By saving seeds from diverse plant species and cultivars, gardeners contribute to the conservation of biodiversity, ensuring that rare and heirloom plant varieties continue to thrive.
Sustainability and Self-Sufficiency
Seed saving empowers individuals to become more self-sufficient in their gardening endeavors. By growing plants from saved seeds, gardeners reduce their reliance on commercially produced seeds, promoting a more sustainable approach to gardening that is mindful of environmental impact.
Cost-Effective Gardening
One of the most tangible benefits of seed saving is the cost-effectiveness it offers to gardeners. By harvesting and storing seeds from mature plants, gardeners eliminate the need to purchase new seeds for each planting season, resulting in long-term savings and a more budget-friendly approach to gardening.
Adaptability to Local Conditions
Seeds saved from plants that have thrived in a particular garden or region exhibit a heightened adaptability to local growing conditions. This adaptability can lead to stronger, more resilient plants that are better equipped to withstand local climate fluctuations and environmental challenges.
Community Engagement and Sharing
Seed saving fosters a sense of community among gardeners, encouraging the exchange of knowledge, resources, and seeds. Through seed swaps and sharing initiatives, gardeners can connect with one another, celebrate diversity, and collectively contribute to the preservation of plant heritage.
Conclusion
In conclusion, the benefits of seed saving extend far beyond the act of planting a new seed. From preserving biodiversity and promoting sustainability to fostering community engagement and self-sufficiency, seed saving holds immense value for both individual gardeners and the broader gardening community. Embracing seed saving practices not only enhances the richness of our gardens but also contributes to a more interconnected and sustainable world.