Introduction
Welcome to our comprehensive guide on how to grow garlic at home. If you’ve ever wanted to cultivate this aromatic and flavorful herb in your own garden, you’ve come to the right place. Whether you’re a seasoned gardener or just starting out, growing garlic can be a rewarding experience that yields delicious results.
Why Grow Garlic at Home?
- Flavor: Homegrown garlic has a more intense flavor compared to store-bought varieties, adding a gourmet touch to your dishes.
- Health Benefits: Garlic is known for its numerous health benefits, including boosting the immune system and reducing the risk of certain diseases.
- Sustainability: By growing your own garlic, you reduce reliance on store-bought produce and can ensure it’s grown pesticide-free.
- Saving Money: Garlic is a staple ingredient in many cuisines, and growing it at home can lead to cost savings in the long run.
What You’ll Learn
In this guide, we’ll cover everything you need to know to successfully grow garlic at home. From selecting the right garlic varieties to planting, caring for, and harvesting your crop, we’ll provide you with expert tips and detailed instructions every step of the way.
Get Ready to Embark on Your Garlic-Growing Journey
So, roll up your sleeves, grab your gardening tools, and let’s dive into the wonderful world of growing garlic at home!
Why Grow Garlic at Home
Growing garlic at home can be a rewarding experience both in terms of flavor and health benefits. Here are some reasons why you should consider growing your own garlic:
1. Freshness and Flavor
Growing garlic at home allows you to experience the unparalleled freshness and flavor of freshly harvested garlic. Unlike store-bought garlic that may have been sitting on shelves for weeks or months, home-grown garlic offers a robust and intense flavor that can elevate your culinary creations.
2. Health Benefits
Garlic is renowned for its numerous health benefits, including boosting the immune system, reducing blood pressure, and combating sickness. By growing garlic at home, you can ensure that you are consuming garlic at its peak freshness, maximizing its potential health effects.
3. Cost-Effective
Home-grown garlic can be a cost-effective option in the long run. While the initial investment may be required for planting materials, the ability to propagate garlic from your own harvests can result in significant savings over time. Plus, you’ll have access to fresh garlic whenever you need it, reducing the need to purchase expensive store-bought varieties.
4. Sustainability
By growing garlic at home, you contribute to sustainable practices. You have full control over the growing process, allowing you to opt for organic methods and reduce your carbon footprint. Additionally, you can avoid the environmental impact associated with packaging and transporting commercially grown garlic.
Embark on the journey of growing your own garlic at home and unlock a world of freshness, flavor, and health benefits!
Benefits of Homegrown Garlic
Homegrown garlic offers a multitude of benefits, not just in terms of flavor but also for your health and the environment.
1. Enhanced Flavor Profile
Homegrown garlic tends to have a more robust flavor compared to store-bought varieties. The freshness of homegrown garlic elevates the taste of your dishes, adding a depth of flavor that is unparalleled.
2. Nutritional Superiority
Garlic is renowned for its numerous health benefits, from boosting the immune system to reducing inflammation. Homegrown garlic is packed with essential nutrients and antioxidants, ensuring you receive the maximum nutritional value with every clove.
3. Environmental Impact
Growing garlic at home allows you to reduce your carbon footprint. By eliminating the need for long transportation and excessive packaging, you contribute to a more sustainable environment. Additionally, you have control over the use of pesticides and chemicals, promoting eco-friendly practices.
4. Cost-Effectiveness
Homegrown garlic can result in significant cost savings in the long run. Once you have established a garlic crop, you can continuously harvest fresh cloves without the need for repeated purchases. This cost-effective approach not only benefits your wallet but also ensures a fresh supply of garlic at your disposal.
5. Therapeutic Uses
Garlic has been used for its medicinal properties for centuries. Homegrown garlic allows you to explore various therapeutic uses, such as creating homemade remedies for colds, promoting heart health, or even incorporating garlic into your skincare routine for its antibacterial properties.
Embrace the benefits of growing garlic at home and savor the rewards it brings to your culinary experiences and well-being.
Getting Started
When venturing into the world of growing garlic at home, it is essential to begin on the right foot. Here’s a guide to help you kickstart your garlic cultivation journey:
Choosing the Right Garlic Varieties
Selecting the appropriate garlic variety is crucial for successful growth. Consider factors such as flavor preferences, climate compatibility, and intended use (cooking or planting). Some popular varieties include:
- Hardneck Garlic: Known for its complex flavors and easy-to-peel cloves.
- Softneck Garlic: Ideal for braiding due to its flexible stems and long storage life.
Preparing the Planting Area
Garlic thrives in well-draining soil with plenty of sunlight. Follow these steps to prepare the planting area:
- Soil Testing: Conduct a soil test to determine pH levels and nutrient content.
- Loosening the Soil: Ensure the soil is loose to allow easy bulb growth and development.
- Adding Compost: Incorporate compost to enrich the soil with essential nutrients.
Obtaining Quality Seed Garlic
Quality seed garlic sets the foundation for a successful harvest. Look for the following characteristics when selecting seed garlic:Large Cloves: Garlic bulbs with large cloves tend to produce robust plants. Firm Texture: Avoid soft or moldy cloves as they may not sprout effectively.
Deciding on Planting Methods
There are two primary methods for planting garlic:
- Individual Cloves: Plant cloves individually to allow each to develop into a full bulb.
- Whole Bulbs: Plant entire bulbs to yield clusters of smaller garlic heads.
Selecting the Right Garlic Variety
When it comes to growing garlic at home, selecting the right variety is crucial for a successful harvest. Different garlic varieties have unique flavors, sizes, and growing requirements. Here are some key points to consider when choosing the best garlic variety for your home garden:
1. Hardneck vs. Softneck Garlic
Garlic varieties are typically classified as either hardneck or softneck, each with its own characteristics:
- Hardneck Garlic: Known for their large, easy-to-peel cloves and intense flavors. They thrive in colder climates and produce scapes, edible curly shoots.
- Softneck Garlic: These varieties have a milder flavor and are known for their long storage life. They are well-suited for warmer climates and do not produce scapes.
2. Choosing the Right Variety for Your Climate
Consider your growing region when selecting a garlic variety. Some garlic types are better suited for specific climates:
- “Siberian: Ideal for cold climates, with a spicy flavor.”
- “California Late: Suitable for warmer regions and has a mild flavor.”
3. Flavor Profiles
The flavor of garlic can vary widely between different varieties. Whether you prefer a mild taste or a more robust flavor, there is a garlic variety to suit your palate:Spanish Roja: A rich, full-bodied flavor that is perfect for cooking. German Red: A spicy and bold garlic variety that adds a kick to dishes.
4. Consider Growth Habits
Some garlic varieties may have specific growth habits that suit your gardening style:
- Early Maturing Varieties: Ready for harvest sooner, perfect for impatient gardeners.
- Long-Storing Varieties: Garlic that can be stored for extended periods without spoiling.
By selecting the right garlic variety for your home garden based on flavor preferences, climate, and growth habits, you can ensure a bountiful harvest of this flavorful bulb.
Preparing the Planting Site
Proper preparation of the planting site is crucial to ensure the successful growth of garlic in your home garden. Follow these essential steps to create an optimal environment for your garlic plants:
Selecting the Location
Choose a site that receives full sun exposure for at least six to eight hours a day. Garlic thrives in well-drained soil, so avoid areas prone to waterlogging.
Preparing the Soil
Before planting, loosen the soil to a depth of at least 8 inches using a garden fork. Incorporate compost or aged manure to improve soil fertility and drainage.
Spacing the Plants
Space garlic cloves about 6 inches apart in rows that are 12 inches apart. Ensure proper air circulation between plants to avoid diseases.
Mulching
After planting, apply a layer of organic mulch such as straw or shredded leaves around the garlic plants to conserve moisture and suppress weeds.
Watering
Keep the soil evenly moist but not waterlogged throughout the growing season. Water deeply about once a week, adjusting based on weather conditions.
Fertilizing
Garlic plants benefit from a balanced fertilizer application during the growing season. Use a fertilizer high in nitrogen to promote strong vegetative growth.
Testing the Soil
It’s advisable to conduct a soil test to determine the pH levels and nutrient content of your soil. Adjust soil pH if necessary to ensure optimal garlic growth.
Gathering Necessary Tools and Materials
Essential Tools and Equipment
Before embarking on your garlic growing journey, ensure you have the following tools and materials ready:
- Spade or Trowel: For soil preparation and planting.
- Gloves: To protect your hands while working in the soil.
- Watering Can or Hose: Essential for watering your garlic plants.
- Measuring Tape: Useful for spacing out your garlic cloves correctly.
- Mulch: Helps retain moisture and suppress weeds.
Quality Garlic Bulbs
When selecting garlic bulbs for planting, look for the following characteristics:
- Healthy Bulbs: Choose firm, plump bulbs without any signs of damage or mold.
- Organic Bulbs: Opt for organic garlic to reduce the risk of pesticide exposure.
- Varietal Selection: Select a variety suited to your climate for optimal growth.
Preparing the Soil
Proper soil preparation is key to successful garlic cultivation:
- Loosen the Soil: Use a spade or tiller to loosen the soil to a depth of at least 8 inches.
- Remove Weeds: Clear the planting area of any weeds or debris that may compete with your garlic.
- Add Compost: Incorporate well-rotted compost to improve soil fertility and drainage.
Purchasing Seed Garlic
Invest in quality seed garlic to ensure a successful harvest:
“The quality of your seed garlic directly impacts the quality of your harvest. Choose wisely.”
Storage and Handling
Store your seed garlic correctly to maintain its viability:Storage Conditions: Keep garlic bulbs in a cool, dry place with good air circulation until planting. Handling Tips: Avoid rough handling that may damage the cloves and affect their growth.
Planting Garlic
Garlic, with its distinct flavor and numerous health benefits, is a wonderful addition to any garden. Whether you’re a seasoned gardener or just starting out, growing your own garlic can be a rewarding experience. Follow these guidelines to successfully plant and grow garlic at home.
Choosing the Right Garlic
When selecting garlic bulbs for planting, opt for organic varieties free from any signs of damage or disease. Look for plump bulbs with tight, firm cloves that are suitable for your climate.
Preparing the Soil
Garlic thrives in well-draining soil rich in organic matter. Ensure the planting site receives full sun exposure and amend the soil with compost or aged manure to enhance its fertility.
Planting Garlic
Plant garlic cloves in the fall for a summer harvest. Separate the cloves from the bulb just before planting, ensuring each clove is intact and free from damage. Plant cloves 2 inches deep and 4-6 inches apart in rows spaced about 12 inches apart.
Maintenance and Care
- Keep the soil consistently moist but not waterlogged throughout the growing season.
- Mulch around the plants with straw or compost to suppress weeds and retain soil moisture.
- Provide adequate nutrients by side-dressing with compost or a balanced fertilizer in early spring.
Harvesting Garlic
Harvest garlic when the lower leaves start to yellow and wither, typically in late summer. Gently dig up the bulbs, brush off excess dirt, and cure them in a warm, dry place with good air circulation for a few weeks before storing.
By following these planting tips and providing proper care, you can enjoy a bountiful harvest of flavorful garlic grown right in your own backyard.
Choosing the Planting Time
Deciding on the right time to plant your garlic is crucial for a successful harvest. Factors such as climate, soil conditions, and garlic variety play a significant role in determining the ideal planting time.
Consider the Following When Choosing the Planting Time:
- Climate: Garlic is typically planted in the fall for a summer harvest. Choose a time when the weather is cooler and the soil is workable, usually a few weeks before the first frost date in your area.
- Soil Conditions: Ensure the soil is well-draining and rich in organic matter. Avoid planting in waterlogged or compacted soil, as this can hinder garlic growth.
- Garlic Variety: Different garlic varieties have varying planting time requirements. Softneck varieties are usually planted in the fall, while hardneck varieties can tolerate colder temperatures and are often planted in late fall or early winter.
Optimal Planting Time for Different Regions:
Different regions have varying climates and optimal planting times for garlic. Here are some general guidelines:
| Region | Ideal Planting Time |
|---|---|
| Northern Regions | Late summer to early fall |
| Central Regions | Mid to late fall |
| Southern Regions | Fall to early winter |
Quote:
“The key to a successful garlic harvest lies in planting at the right time, ensuring optimal growing conditions for your garlic bulbs.”
Proper Spacing and Depth for Cloves
When it comes to planting garlic, ensuring the proper spacing and depth for cloves is crucial for their growth and development. Follow these guidelines to give your garlic the best start:
Spacing Guidelines
- Row Spacing: Maintain rows that are 12-18 inches apart to allow for proper airflow and maintenance.
- Clove Spacing: Plant individual cloves 4-6 inches apart within the row to provide ample space for bulb formation.
Depth Recommendations
- Planting Depth: Dig a hole approximately 2 inches deep to place each clove. Ensure the pointy end is facing up while the flat root end is down.
- Soil Covering: Once the cloves are in place, cover them with soil and gently pat it down to secure them in the ground.
Proper spacing and depth not only encourage healthy growth but also make maintenance tasks such as weeding and harvesting much more manageable. Remember, a little attention to detail during planting can lead to a bountiful garlic harvest!
Caring for Garlic Plants
Soil and Watering
Garlic plants require well-draining soil rich in organic matter. Keep the soil consistently moist but not waterlogged, especially during the growing season. Overwatering can lead to rotting.
Sunlight and Temperature
Ensure your garlic plants receive plenty of sunlight, at least six to eight hours a day. They thrive in cooler temperatures, ideally between 60-68°F (15-20°C) during the growing period.
Fertilization
Use a balanced fertilizer when planting garlic in the soil. Side-dress with nitrogen-rich fertilizer once or twice during the growing season to promote healthy growth.
Weed Control
Regularly remove weeds around your garlic plants to prevent competition for nutrients. Be cautious while weeding to avoid damaging the shallow root systems of the garlic.
Pest and Disease Management
Keep an eye out for pests such as aphids and nematodes that can damage garlic plants. Consider using organic pest control methods and practice crop rotation to reduce disease incidence.
Harvesting and Storage
Garlic bulbs are ready for harvest when the lower leaves start to turn yellow and wither. Carefully dig them up, brush off excess soil, and allow them to cure in a warm, dry place before storing in a cool, well-ventilated area.
Subject: Harvesting and Storing
When to Harvest
Harvesting garlic at the right time is crucial to ensure optimal flavor and storage quality. Wait until two-thirds of the leaves have turned brown but there are still a few green leaves remaining.
Harvesting Techniques
Use a hand shovel or fork to gently loosen the soil around the bulbs. Be careful not to damage the bulbs during this process. Gently lift the bulbs from the ground, leaving the foliage attached.
Curing Process
After harvesting, it’s essential to cure the garlic to improve its shelf life and flavor. Hang the garlic bulbs in bundles in a cool, dry, and well-ventilated area for 2-4 weeks. Ensure good air circulation to prevent mold.
Storing Garlic
Once the garlic is fully cured, trim the roots and cut back the leaves. Store the bulbs in a cool, dark place with good ventilation. Avoid storing garlic in the refrigerator as it can cause sprouting.
Best Storage Practices
- Avoid storing garlic near onions or potatoes as they can cause garlic to spoil faster.
- Use a mesh bag or a wicker basket for storing garlic to ensure proper air circulation.
- Check stored garlic regularly and remove any sprouting or moldy bulbs to prevent them from spoiling the rest.
Quote
“Proper harvesting and storing techniques are essential to enjoy the full flavor and benefits of homegrown garlic.”
Signs that garlic is ready for harvest
Knowing when to harvest your garlic is crucial to ensure optimal flavor and storage quality. Here are some key signs to look out for:
1. Leaf Color and Condition
Pay attention to the garlic plant’s leaves. Yellowing and browning of the lower leaves is a sign that the bulb is maturing. Additionally, the leaves should still be mostly green at the top of the plant.
2. Scapes Appearance
Garlic scapes, the curly tops of hardneck garlic varieties, will start to straighten out and may even turn woody. This indicates that the bulb beneath is reaching maturity.
3. Bulb Size and Clove Separation
Large, plump bulbs are a good indicator that the garlic is ready to be harvested. Check for well-defined cloves that are visible and separable within the bulb.
4. Soil Dryness
Around three weeks before harvesting, reduce watering to allow the garlic bulbs to begin drying out. The soil should be mostly dry but not bone-dry at the time of harvest.
5. Timing from Planting
Depending on the garlic variety, most types are ready to harvest approximately 8-10 months after planting. Keep track of the planting date to gauge when your garlic is likely mature.

By paying attention to these signs of readiness for harvest, you can ensure that your garlic is picked at the peak of its flavor and ready for storage or immediate use.
Techniques for Harvesting Garlic
Harvesting garlic is a crucial step in the garlic growing process that requires precision and care to ensure optimal flavor and storage. Here are some techniques to help you harvest your garlic crop effectively:
Timing is Key
Harvest garlic when the lower leaves have turned yellow and started to dry. This indicates that the bulbs are mature and ready for harvesting. Avoid waiting too long, as overripe garlic can split and have reduced storage life.
Loosening the Soil
Before harvesting, gently loosen the soil around the bulbs using a digging fork or a garden spade. Be careful not to damage the bulbs during this process, as bruising can lead to spoilage.
Upending the Plants
Gently lift the garlic bulbs from the ground by their tops, avoiding pulling forcefully which can detach the tops from the bulbs. Shake off excess soil and avoid washing the bulbs to prevent moisture-related issues during storage.
Curing for Storage
After harvesting, allow the garlic bulbs to cure in a warm, dry, and well-ventilated area. Hang them upside down or lay them out in a single layer to dry for 2-4 weeks. This process helps develop the garlic’s flavor and improves its storage longevity.
Storage
Once your garlic bulbs are properly cured, trim the roots and cut back the tops to about an inch. Store the garlic in a cool, dry place away from direct sunlight. Use mesh bags or braided strings to hang the bulbs for good airflow and easy access.
By following these harvesting techniques, you can enjoy the fruits of your labor by savoring flavorful garlic in your culinary creations throughout the year.
Proper Storage Methods
Temperature and Humidity
Storing garlic correctly is essential to maintain its quality and flavor. Garlic should be kept in a cool, dry place away from direct sunlight. Ideal storage temperature for garlic ranges between 60-65°F (15-18°C) with a humidity level of 60-70%.
Air Circulation
Airflow is crucial for preserving garlic. Ensure proper ventilation in the storage area to prevent mold and sprouting. Avoid storing garlic in sealed containers as it may lead to moisture buildup.
Storage Containers
Choose suitable containers for storing garlic:
- Mesh bags: Allow for air circulation.
- Wire baskets: Provide good airflow.
- Bamboo baskets: Ideal for storing garlic bulbs.
Avoid Moisture
Moisture can cause garlic to spoil quickly. Make sure the storage area is dry and free from any dampness. If garlic bulbs are dirty, gently brush off the soil before storing.
Away from Odorous Foods
Garlic easily absorbs odors from nearby foods. Store garlic away from strong-smelling foods like onions, shallots, and spices to prevent flavor contamination.
Checking for Spoilage
Regularly inspect stored garlic for any signs of spoilage such as mold, sprouting, or softness. Remove any spoiled cloves immediately to prevent the spread of decay.
Troubleshooting Common Issues
1. Yellowing Leaves
If you notice yellowing leaves on your garlic plants, this could indicate overwatering. Make sure the soil drains well to prevent waterlogged roots.
2. Pests and Diseases
Keep an eye out for common pests and diseases that can affect garlic, such as aphids and white rot. Consider using natural repellents or seek advice from a local gardening expert.
3. Thin or Small Bulbs
Thin or small bulbs may result from overcrowding or inadequate nutrition. Ensure proper spacing when planting and consider adding organic fertilizer to boost growth.
4. Improper Curing
Properly curing garlic is crucial for long-term storage. Hang harvested bulbs in a warm, dry place with good airflow for several weeks to cure them effectively.
5. Incorrect Harvesting Time
Harvesting garlic either too early or too late can impact bulb size and flavor. Wait until the lower leaves turn yellow and begin to dry out before harvesting for optimal results.
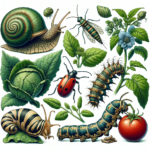
Dealing with Pests and Diseases
Pests and diseases can be a nuisance when growing garlic, but with proper care and early detection, you can prevent significant damage to your crop. Here are some tips to help you deal with these common issues:
1. Prevention is Key
Preventative measures are crucial in maintaining a healthy garlic crop. Ensure proper spacing between plants, adequate ventilation, and avoid overwatering to prevent the onset of pests and diseases.
2. Identifying Common Pests
- Garlic Bloat Nematode: Look out for swollen, distorted bulbs and stunted growth.
- Thrips: These small insects can cause silvering of leaves and affect bulb development.
- White Rot: Characterized by white mold on the base of the plant, leading to rotting.
3. Natural Remedies
Consider using organic pesticides such as neem oil or insecticidal soap to control pest infestations without harming beneficial insects or the environment.
4. Disease Management
For fungal diseases like white rot, crop rotation and ensuring proper drainage can help prevent the spread of the disease to healthy plants.
5. Early Detection
Regularly inspect your garlic plants for any signs of pests or diseases. Early detection allows for prompt action to prevent further spread and damage.
By staying vigilant and following these guidelines, you can effectively manage pests and diseases in your garlic garden, ensuring a bountiful harvest.
Addressing Growth Challenges
Identifying Barriers to Growth
Before diving into strategies for enhancing garlic growth at home, it’s crucial to identify the potential challenges that may hinder the process. Common barriers to garlic growth include:
- Poor soil quality
- Inadequate sunlight exposure
- Improper watering techniques
- Pest infestations
Strategic Solutions
Addressing these challenges requires a strategic approach. Consider the following steps to overcome growth obstacles:
- Amending the soil with organic matter to improve nutrient content.
- Ensuring adequate sunlight by choosing a suitable planting location.
- Implementing a proper watering schedule to maintain soil moisture levels.
- Utilizing natural pest control methods to prevent infestations.
Monitoring Progress
Tracking the growth of your garlic plants is essential to gauge the effectiveness of your strategies. Keep a close eye on the following indicators of growth:Leaf Development: Monitor the size and color of the leaves for signs of healthy growth. Bulb Formation: Observe the bulbs as they mature to ensure they are developing properly. Foliage Color: Check the color of the foliage to identify any nutrient deficiencies.
Seeking Expert Guidance
“When facing persistent growth challenges, don’t hesitate to seek advice from seasoned gardeners or agricultural experts. Their experience can offer invaluable insights to overcome obstacles and foster successful garlic cultivation.”
Enjoying Your Homegrown Garlic
The Aroma of Success
As you step into your garden or kitchen and catch the aromatic allure of your homegrown garlic, you are not just experiencing a scent but the fruits of your labor. Revel in this sensory delight that only a garlic lover can truly appreciate.
Culinary Delights Await
With your freshly harvested garlic bulbs at hand, a world of culinary possibilities unfolds before you. From adding depth to simple dishes to starring in complex recipes, your homegrown garlic is key to unlocking flavor.
The Healthful Benefits
Beyond taste, your homegrown garlic offers a plethora of health benefits. Known for its immune-boosting and antioxidant properties, incorporating garlic into your diet can contribute to your overall well-being.
Sharing the Bounty
Perhaps the most fulfilling aspect of growing garlic at home is the ability to share your harvest with loved ones. Gift a bundle of fresh bulbs and spread the joy of homegrown goodness to family and friends.
Celebrating Your Success
Every clove of garlic you grow is a testament to your dedication and skill as a gardener. Take a moment to celebrate your green thumb and the bountiful garlic crop that now graces your home.
Using Fresh Garlic in Recipes
Enhancing Flavor with Fresh Garlic
Fresh garlic is a culinary treasure that can elevate your dishes with its pungent aroma and distinct taste. Incorporating fresh garlic in your recipes adds depth and complexity that enhances the overall flavor profile.
Preparation Tips
Before using fresh garlic in your recipes, it is essential to properly prepare it to unlock its full flavor potential:
- Peeling: To easily peel garlic cloves, crush them slightly with the flat side of a knife and then remove the skin.
- Chopping: Finely chop garlic for intense flavor or mince it for a milder taste.
- Slicing: Thinly sliced garlic works well in dishes where you want a subtle garlic presence.
Best Practices
When using fresh garlic in recipes, keep the following tips in mind:
- Timing: Add garlic early in the cooking process for a more mellow flavor or towards the end for a stronger taste.
- Heat: Garlic can burn easily, so watch it closely when sautéing and adjust the heat as needed.
- Storage: Store fresh garlic in a cool, dark place with good airflow to preserve its freshness.
Saving Cloves for Future Planting
Storing Garlic Cloves
After harvesting garlic, select the largest and healthiest cloves for saving. These cloves will ensure strong, vigorous plants in the next growing season.
Dry the cloves thoroughly to prevent mold and rot during storage. Place them in a warm, well-ventilated area for about two weeks.
Once dry, store the cloves in a cool, dark place such as a mesh bag or a paper bag. Avoid storing them in plastic, as it can trap moisture.
Preparing for Planting
Before planting saved cloves, inspect them for any signs of damage or disease. Discard any cloves that appear shriveled, soft, or discolored.
Separate the cloves carefully without damaging the papery skin that covers them. Each clove will grow into a new garlic plant.
Label the varieties if you are saving cloves from different types of garlic to keep track of them accurately.
Quotes to Inspire
“In every gardener, there is a child who believes in The Seed Fairy.”
Conclusion
In conclusion, growing garlic at home can be a rewarding and fulfilling experience that not only provides you with a fresh supply of this flavorful ingredient but also allows you to connect with nature and cultivate your own food. Remember to follow the steps outlined in this guide and adjust them based on your specific growing conditions.
Here are some key takeaways:
- Choose the right garlic variety: Select a variety that thrives in your climate and soil type.
- Prepare the soil: Ensure the soil is well-draining, rich in organic matter, and free from weeds.
- Planting: Plant the garlic cloves in the fall, ensuring proper spacing and depth.
- Care and maintenance: Provide adequate water, mulch, and fertilizer throughout the growing season.
- Harvesting: Wait for the garlic plants to mature and harvest when the tops begin to yellow and fall over.
As you embark on your garlic growing journey, remember that patience and observation are key. Each garlic bulb you harvest will be a testament to your dedication and care as a home gardener.
Recap of Key Points
As we summarize our discussion on growing garlic at home, let’s revisit the essential takeaways to ensure a successful harvest.
Choosing the Right Garlic Varieties
- Hardneck vs. Softneck: Understand the differences between these two types to select the best option for your climate and cooking preferences.
- Popular Varieties: Consider planting renowned varieties like ‘Inchelium Red’ or ‘Spanish Roja’ for robust flavors.
Preparing the Planting Environment
“The soil is the great connector of lives, the source and destination of all.”
- Well-Draining Soil: Ensure your soil has good drainage to prevent waterlogging, which can harm garlic bulbs.
- Sunlight Exposure: Select a sunny spot as garlic thrives in full sun, receiving at least 6-8 hours of sunlight daily.
Planting and Caring for Garlic
“To plant a garden is to believe in tomorrow.”
- Planting Depth: Remember to plant cloves tip-up, about 2 inches deep, and space them 4-6 inches apart to allow for proper bulb development.
- Regular Watering: Keep the soil consistently moist but not waterlogged throughout the growing season.
- Mulching: Apply a layer of mulch to regulate soil temperature and retain moisture, promoting healthy garlic growth.
Recognizing Harvest Signals
“A good harvest brings satisfaction to the soul.”
- Foliage Browning: Monitor the garlic plants for drying and browning leaves, signaling the optimal time for harvest.
- Scaping Removal: Trim any scapes that emerge to direct the plant’s energy towards bulb formation.
Storing and Using Your Garlic
“Preserve the flavors of your labor for the seasons ahead.”
- Curing Process: Allow harvested garlic bulbs to cure in a warm, dry location for 2-3 weeks, enhancing their flavor and storability.
- Creative Cooking: Explore various culinary uses for your homegrown garlic, from savory roasts to fragrant sauces.
Celebrating Your Successful Garlic Harvest
Congratulations on the successful harvest of your garlic! Celebrate this momentous occasion with joy and satisfaction in the fruitful results of your hard work and dedication. Here are some meaningful ways to mark this achievement:
Host a Harvest Celebration
Invite friends and family to join you in a festive gathering to celebrate your bountiful garlic harvest. Share stories about your gardening journey, enjoy delicious garlic-inspired dishes, and create lasting memories together.
Preserve Your Garlic
Ensure your garlic harvest lasts by preserving it for future use. Consider drying, braiding, or pickling your garlic cloves to enjoy their flavors in various culinary creations throughout the year.
Reflect on Your Growth
Take a moment to reflect on the growth and progress you’ve experienced throughout the garlic cultivation process. Celebrate not just the harvest, but also the personal growth and skills you’ve developed along the way.
Create a Garlic Showcase
Display your harvested garlic in a beautiful showcase to honor the hard work that went into cultivating it. Let it serve as a reminder of your successful harvest and as inspiration for future gardening endeavors.
Share Your Harvest
Spread the joy of your garlic harvest by sharing your bounty with neighbors, colleagues, or local community members. A gesture of generosity not only spreads happiness but also fosters a sense of community and connectedness.
Embrace Gratitude
Express gratitude for the elements, time, effort, and knowledge that contributed to your successful garlic harvest. Cultivate a sense of appreciation for the abundance that nature provides and the fulfillment that comes from nurturing plant life.
Celebrating your successful garlic harvest is not just about the end result but also about acknowledging the journey you’ve traveled to reach this point. Embrace the sense of accomplishment and fulfillment that comes with growing your own garlic at home.