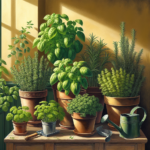
Understanding Plant Propagation
Plant propagation is the process of creating new plants from a variety of sources, such as seeds, cuttings, or division. Understanding this essential technique allows gardeners to expand their plant collection and ensure the future growth and diversity of their gardens.
The Importance of Plant Propagation
Plant propagation plays a vital role in:
- Preserving rare and heirloom plant varieties
- Producing multiple plants from a single source
- Expanding garden or landscape areas
Methods of Plant Propagation
There are various methods of plant propagation, including:
- Seeds: Growing plants from seeds is one of the most common and natural methods of propagation.
- Cuttings: Propagating plants from cuttings involves taking a portion of a plant and encouraging it to grow roots.
- Division: This method involves dividing a mature plant into sections, each of which can grow into a new plant.
- Grafting: Grafting involves joining tissues of different plants to create a new plant with the combined traits of both.
Benefits of Growing Plants from Cuttings
Growing plants from cuttings is a popular propagation method known for its numerous benefits:
- Quicker and more reliable results compared to growing from seeds
- Preservation of the desirable traits of the parent plant
- Ability to produce multiple plants that are genetically identical to the parent
- More efficient use of space and resources
Key Factors in Successful Plant Propagation
Successful plant propagation relies on:
- Timing: Choosing the right time of year for propagation based on the plant’s natural growth cycle
- Propagation Medium: Providing the ideal growing environment for roots to develop
- Regular Monitoring: Checking the progress of the new plants to ensure proper growth
- Patience: Understanding that propagation is a gradual process that requires time and attention
By mastering the art of plant propagation, gardeners can not only grow their plant collections but also deepen their connection to the natural world and the lifecycle of plants.
What is Plant Propagation?
Plant propagation is the process of creating new plants from a variety of sources such as seeds, cuttings, or other plant parts. It is a fundamental technique for gardeners and horticulturists to expand their plant collection, preserve rare species, or simply multiply their favorite plants.
Methods of Plant Propagation
There are several methods of plant propagation, each with its own advantages and suitable plant types:
- Seed Propagation: Growing plants from seeds is a common and cost-effective method suitable for many plant varieties.
- Cutting Propagation: Propagating plants from cuttings involves taking a piece of a plant and encouraging it to grow roots, producing an identical plant.
- Division: This method involves separating a mature plant into smaller sections, each capable of growing into a new plant.
- Grafting: Grafting involves joining tissues from two plants to grow as one, combining the best qualities of each.
Benefits of Plant Propagation
Plant propagation offers numerous benefits to gardeners and plant enthusiasts:
- Biodiversity: Propagation allows for the conservation and preservation of rare or endangered plant species.
- Cost-Effective: Producing new plants through propagation can be more economical than purchasing established plants.
- Control: By propagating plants, individuals have more control over the quality and quantity of their plant collection.
- Sustainability: Propagation promotes sustainable gardening practices by reducing the need for sourcing plants from external suppliers.
Benefits of Growing Plants from Cuttings
The Magic of Cuttings
Growing plants from cuttings offers magical benefits that go beyond mere propagation. It allows you to create new plants with the exact traits you desire, ensuring a beautiful and cohesive garden.
Preservation of Desirable Traits
By taking cuttings from your healthiest and most vigorous plants, you preserve their desirable qualities. This method ensures that the new plant will inherit the same characteristics, such as color, size, or flower shape.
Speedy Growth and Development
Plants grown from cuttings tend to establish themselves more quickly than those grown from seeds. This accelerated growth can lead to earlier blooming and faster maturity, allowing you to enjoy your plants’ beauty sooner.
Cost-Effective Propagation
One of the most significant advantages of growing plants from cuttings is the cost-effectiveness it offers. Instead of purchasing new plants, you can multiply your existing ones at little to no cost, saving money in the long run.
Ensuring Plant Health
Starting new plants from cuttings taken from your own garden reduces the risk of introducing pests or diseases from external sources. This promotes overall plant health and minimizes the need for chemical interventions.
Satisfaction of Self-Propagation
There is a profound satisfaction that comes from propagating plants through cuttings. Watching a tiny cutting grow into a thriving plant nurtured by your own efforts is a rewarding experience that fosters a deep connection to your garden.
Types of Plants Suitable for Propagation
1. Herbaceous Plants
Herbaceous plants are non-woody plants that are ideal for propagation through cuttings. Examples include mint, basil, and lavender.
2. Woody Shrubs
Woody shrubs, such as hydrangeas, roses, and butterfly bushes, can be propagated from cuttings to create new plants with desirable qualities.
3. Succulents and Cacti
Succulents and cacti are popular choices for propagation due to their unique shapes and low maintenance requirements. Varieties like jade plants and prickly pears can thrive from cuttings.
4. Perennials
Perennials like hostas, peonies, and daylilies are suitable for propagation through cuttings, allowing for the expansion of your garden with beloved plants.
5. Fruit-bearing Plants
Fruit-bearing plants such as berries, grapes, and figs can be propagated to ensure a fresh supply of delicious fruits in your garden.
6. Houseplants
Houseplants like pothos, spider plants, and philodendrons are excellent candidates for propagation, making it easy to share these green beauties with friends and family.
Getting Started with Cuttings
The Basics of Propagating Plants from Cuttings
Propagating plants from cuttings can be a rewarding and cost-effective way to expand your garden. By following the right techniques, you can grow new plants from existing ones with ease.
Choosing the Right Plants
Not all plants can be propagated from cuttings successfully. Plants that are best suited for this method include:
- Herbaceous plants like mint and basil
- Houseplants such as pothos and spider plants
- Woody plants like rosemary and lavender
Tools and Materials
Having the right tools and materials is crucial for successful propagation. Here are some essential items you will need:
- Sharp pruning shears or a knife
- Rooting hormone to encourage root growth
- Potting mix suitable for cuttings
- Clean containers for planting
Taking Cuttings
When taking cuttings, remember these key points:
- Choose healthy stems from the parent plant
- Cut just below a node at a 45-degree angle
- Remove lower leaves to prevent rotting
Rooting the Cuttings
After taking the cuttings, it’s time to root them:
- Dip the cut end in rooting hormone
- Plant the cutting in moist potting mix
- Keep the soil consistently moist but not waterlogged
Monitoring and Care
Proper care is essential for the success of your cuttings:
Monitor the humidity levels, provide indirect light, and avoid overwatering.
With patience and care, your cuttings will develop roots and grow into healthy plants ready for transplanting.
Choosing the Right Tools and Equipment
Essential Tools for Successful Plant Propagation
When it comes to growing plants from cuttings, having the right tools and equipment can make all the difference. Here are some essential items you’ll need:
- Sharp Pruning Shears: A high-quality pair of pruning shears will ensure clean cuts, promoting better rooting.
- Rooting Hormone: Using a rooting hormone powder or gel can encourage quicker root development.
- Propagation Trays: These trays provide a suitable environment for root growth, maintaining high humidity levels.
- Sterilized Cutting Tool: Keeping your tools clean and sterilized can prevent diseases from spreading to your cuttings.
Choosing the Right Container
When selecting containers for your cuttings, opt for ones that are the right size and material. A good container should:
- Allow for Proper Drainage: Excess water can be detrimental to your cuttings, so ensure the container has adequate drainage holes.
- Be Clean and Sterile: Clean containers reduce the risk of fungal infections and promote a healthy rooting environment.
Protective Gear for Safe Propagation
While propagating plants, it’s crucial to protect yourself. Consider having the following gear on hand:
- Gloves: Gardening gloves can shield your hands from any sharp tools and potential irritants.
- Eye Protection: Safety glasses or goggles protect your eyes from debris when cutting or handling plants.
Maintaining and Storing Your Tools
Proper maintenance of your tools ensures longevity and efficiency. Remember to:
- Clean After Each Use: Removing plant residue prevents the spread of diseases and keeps your tools in top condition.
- Store in a Dry Place: Moisture can cause rust and damage, so store your tools in a dry location.
Selecting Healthy Parent Plants
Choosing the right parent plants is crucial when propagating through cuttings. Below are essential guidelines to help you select the healthiest and most suitable plants for successful propagation:
1. Plant Selection
- Choose Vigorous Plants: Look for parent plants that are healthy, disease-free, and exhibit robust growth.
- Opt for Young Shoots: Select plant stems that are young and healthy as they tend to root faster and more successfully.
2. Visual Inspection
- Check for Pests: Inspect the parent plants for any signs of pests or diseases that could transfer to the new cuttings.
- Assess Overall Health: Ensure the leaves are vibrant, there are no signs of wilting, and the plant looks well-nourished.
3. Consider Growth Habits
- Match Growth Conditions: Select parent plants that thrive in similar environmental conditions as the location where you intend to grow the cuttings.
- Understand Plant Requirements: Familiarize yourself with the specific needs of the plant species to provide optimal care during propagation.
4. Rooting Potential
- Focus on Rooting Ability: Some plants root more readily from cuttings than others. Research the rooting characteristics of the plant species before making a choice.
By carefully selecting healthy parent plants, you set the foundation for successful propagation through cuttings. Take the time to assess the plants thoroughly to ensure the best chances of rooting and growth for your cuttings.
Timing and Best Practices for Taking Cuttings
When is the Best Time to Take Cuttings?
Taking cuttings at the right time is crucial for successful propagation. Typically, the best time to take cuttings is during the plant’s active growing season, which is usually in the spring and early summer. This is when the plant is actively growing and has more energy to develop new roots.
Choosing the Right Tools
Using sharp, clean tools is essential when taking cuttings to ensure clean cuts that promote quicker healing and reduce the risk of disease transmission. You can use a sharp pair of pruning shears or a clean blade to cut your plant’s stem at the desired length.
Preparing the Cuttings
- Select Healthy Plants: Choose a healthy and disease-free plant to take cuttings from for the best chances of successful propagation.
- Cut at the Right Angle: Make clean cuts at a 45-degree angle right below a leaf node to provide a larger area for root development.
- Remove Lower Leaves: Remove the lower leaves of the cutting to prevent them from being submerged in the planting medium.
Rooting Hormones
Using rooting hormones can help speed up the root development process and increase the chances of successful propagation. These hormones stimulate root growth and can be applied to the cut end of the stem before planting.
Planting the Cuttings
- Choose a Well-Draining Medium: Plant your cuttings in a well-draining medium such as a mix of perlite and peat moss to prevent waterlogging.
- Provide Adequate Moisture: Keep the planting medium consistently moist but not waterlogged to encourage root development.
- Provide Indirect Light: Place the cuttings in a location with indirect light to promote growth without exposing them to direct sunlight, which can cause wilting.
Monitoring and Care
Regularly monitor the cuttings for signs of growth and ensure the planting medium remains moist. Avoid overwatering, as it can lead to rotting, and provide a stable and warm environment for the cuttings to thrive.
Preparing and Handling Cuttings
When propagating plants through cuttings, proper preparation and handling techniques play a crucial role in the success of the propagation process. The following guidelines will assist you in effectively handling cuttings for optimal growth:
Selection of Plant Material
Choose:
- Healthy: Select cuttings from healthy, disease-free plants to ensure the best chances of successful propagation.
- Mature: Opt for stem cuttings taken from well-established plants with developed stems.
- Timing: Take cuttings during the plant’s active growth period for higher success rates.
Cutting Preparation
Steps:
- Tools: Use sharp, sterilized tools to make clean cuts that minimize damage to the plant tissue.
- Angle: Cut the stems at a 45-degree angle to increase the surface area for root development.
- Remove Leaves: Trim excess leaves to reduce moisture loss and promote root growth.
Handling and Planting
Key Points:Gentleness: Handle cuttings with care to prevent damage to the delicate tissues. Planting Depth: Plant the cuttings at the appropriate depth in a well-draining rooting medium to facilitate root formation. Moisture: Ensure the medium is consistently moist but not waterlogged to support root development without causing rot.
By following these essential steps in preparing and handling cuttings, you can enhance the success rates of your plant propagation endeavors. Remember, patience and attention to detail are key elements in nurturing the growth of new plants from cuttings.
Proper Cutting Techniques
When it comes to growing plants from cuttings, using proper cutting techniques is crucial for the success of the propagation process. Below are some key guidelines to follow:
Cutting Preparation
- Ensure your cutting tool, whether scissors or shears, is sharp and clean to make precise cuts.
- Select a healthy, disease-free plant to take the cutting from.
Choosing the Cutting
- Opt for new growth that is neither too soft nor too woody, typically found at the tips of branches.
- Make sure the cutting has several nodes where roots can potentially grow.
Cutting Techniques
- Make a clean cut at a 45-degree angle right below a node using a swift motion to prevent crushing the stem.
- Remove any flowers or buds on the cutting to redirect the plant’s energy towards root development.
Rooting Hormones
Consider using rooting hormones to encourage quicker root formation on your cuttings. These substances help stimulate root growth and can increase the success rate of propagation.
Proper Care
After taking the cuttings, place them in a suitable growing medium, keep them moist but not waterlogged, and provide them with indirect light to promote root development.
Remember, patience is key when growing plants from cuttings. With proper cutting techniques and care, you can successfully propagate new plants and expand your garden with ease.
Using Rooting Hormones Effectively
When it comes to propagating plants from cuttings, using rooting hormones can significantly increase the success rate of your endeavors. Understanding how to utilize these hormones effectively is essential for nurturing strong and healthy new plants.
The Purpose of Rooting Hormones
Rooting hormones contain auxins, which are plant hormones that stimulate root development. By applying rooting hormones to the cut ends of plant cuttings, you can encourage the growth of new roots, leading to successful propagation.
Types of Rooting Hormones
There are different types of rooting hormones available, including powder, liquid, and gel formulations. Each type has its own advantages and is suitable for various plant species and cutting types.
Application Techniques
- Ensure Cleanliness: Before applying rooting hormones, make sure the cutting tool, container, and work area are clean to prevent contamination.
- Use Correct Concentration: Follow the manufacturer’s instructions to determine the appropriate concentration of rooting hormone to use.
- Dip or Dust: Dip the cut end of the cutting into the rooting hormone powder or solution, or lightly dust the end for adequate coverage.
- Avoid Excess: Shake off any excess rooting hormone to prevent issues such as rotting of the cutting.
Best Practices
Applying rooting hormones in moderation and with care can greatly enhance the success of your plant propagation efforts.
Remember, while rooting hormones can improve the chances of successful propagation, providing optimal growing conditions such as appropriate moisture, warmth, and light are equally crucial for the overall health of your new plants.
Dealing with different types of cuttings (softwood, hardwood, semi-hardwood)
When it comes to propagating plants from cuttings, understanding the various types of cuttings is crucial for success. Each type – softwood, hardwood, and semi-hardwood – requires specific care and techniques for optimal growth. Let’s delve into the nuances of each:
Softwood Cuttings
Key Points:
- Softwood cuttings are taken from fresh, new growth typically found at the tips of branches.
- These cuttings root quickly but are more delicate and susceptible to drying out.
- Best suited for plants that are actively growing, usually in the spring.
Hardwood Cuttings
Key Points:
- Hardwood cuttings are taken from matured, woody stems during the plant’s dormant season.
- These cuttings root slowly but are hardier and can withstand harsher conditions.
- Commonly taken in late autumn or winter when the plant is dormant.
Semi-Hardwood Cuttings
Key Points:
- Semi-hardwood cuttings fall between softwood and hardwood in terms of maturity.
- Obtained from partially mature stems, they strike a balance between rooting speed and hardiness.
- Usually taken in late summer to early autumn.
Each type of cutting demands specific attention to detail. By matching the right cutting type with the plant and the season, you set the stage for successful propagation and robust plant growth.
Propagation Methods
When it comes to growing plants from cuttings, there are several propagation methods you can explore. Each method has its own advantages and requirements, so it’s essential to choose the one that best suits the plant species you are working with.
1. Stem Cuttings
Stem cuttings involve taking a piece of stem from a parent plant and encouraging it to grow roots. This method is commonly used for many houseplants and woody ornamentals.
2. Leaf Cuttings
Leaf cuttings require a leaf to be removed from the plant and rooted to create a new plant. This method is suitable for plants with fleshy leaves like African violets.
3. Root Cuttings
Root cuttings involve taking a section of a plant’s root and encouraging it to sprout new growth. This method is typically used for perennial plants such as mint and horseradish.
4. Layering
Layering is a method where a stem is bent and partially covered with soil to stimulate root growth. Once roots have developed, the stem can be separated to create a new plant.
Remember, proper care and attention to detail are crucial when propagating plants from cuttings. Ensure you provide the right environment, moisture, and nutrients for successful root development.
Water Propagation
Water propagation is a simple and effective method for growing plants from cuttings. By following the right steps, you can encourage root growth and nurture new plant life with ease.
Benefits of Water Propagation
- Visibility: Watching roots grow in water can be a rewarding and educational experience.
- Low Maintenance: Requires minimal effort and materials compared to other propagation methods.
- Easy Monitoring: Allows you to easily check on root development and adjust as needed.
How to Propagate Plants in Water
- Selecting Cuttings: Choose healthy stems from the parent plant with at least a few leaves.
- Preparing the Cutting: Trim the cutting right below a node and remove any lower leaves to prevent them from submerging in water.
- Placing in Water: Place the cutting in a clear container filled with room temperature water, ensuring the nodes are submerged.
- Light and Location: Keep the container in a warm, bright location but away from direct sunlight to prevent algae growth.
- Changing Water: Replace the water every few days to prevent bacterial growth and ensure oxygen availability.
- Root Development: Root growth will typically begin within a few weeks, and once roots are well established, the cutting can be transferred to soil.
Tips for Successful Water Propagation
“Patience is key in water propagation. Resist the urge to transplant the cutting too early to allow for robust root development.”
By following these steps and staying attentive to the needs of your cuttings, you can successfully propagate plants in water and expand your green collection with confidence.
Soil Propagation
Preparing the Soil
Before starting the propagation process, it’s crucial to prepare the soil adequately. Here are some essential steps:
- Choose the Right Soil: Use a well-draining and nutrient-rich soil mix to ensure the cuttings have the best chance of rooting successfully.
- Sterilize the Soil: Heat-treat or use sterile potting mix to prevent diseases that can hamper the cutting’s growth.
- Moisture Level: Ensure the soil is moist but not waterlogged as excessive moisture can rot the cuttings.
Planting the Cuttings
Once the soil is prepared, it’s time to plant the cuttings. Follow these steps for successful planting:
- Prepare the Cuttings: Trim the cutting at a 45-degree angle just below a node and remove any leaves from the lower nodes to prevent rotting.
- Make a Hole: Use a dibber or pencil to create a hole in the soil for inserting the cutting.
- Insert the Cutting: Gently place the cutting into the hole and press the soil around it to secure it in place.
Post-Planting Care
After planting the cuttings, proper care is essential to encourage healthy root development. Consider the following post-planting care tips:
“The art of propagation lies not only in planting but in nurturing.”
- Provide Adequate Water: Maintain consistent moisture levels without overwatering the cuttings.
- Monitor Light Levels: Place the cuttings in a bright location but avoid direct sunlight to prevent scorching.
- Protect from Pests: Keep an eye out for pests and take necessary measures to protect the young cuttings.
Air Layering
When it comes to propagating plants, air layering is a popular and effective technique that allows you to grow new plants from existing ones. Unlike other methods, air layering encourages roots to develop on a branch while still attached to the parent plant.
Key Steps for Air Layering:
- Select a Healthy Branch: Choose a branch that is healthy, flexible, and about the width of a pencil for the best results.
- Make a Slanted Cut: Create a small slanting incision about halfway through the branch. This cut will promote root growth.
- Apply Rooting Hormone: Use rooting hormone on the exposed area to encourage root development.
- Wrap with Moist Moss: Surround the incision with damp sphagnum moss and secure it with plastic wrap or a strip of cloth.
- Monitor and Wait: Check the moss regularly to ensure it stays moist. Over time, roots will form within the moss.
- Separate and Plant: Once roots have developed, carefully cut below the new root system and plant it in soil.
Tips for Success:
- Choose the right time of year for air layering, typically in the spring or early summer when plants are actively growing.
- Keep the moss consistently moist to promote root growth.
- Ensure the wrapping around the moss is secure to maintain humidity.
- Patience is key – root development can take several weeks to months depending on the plant.
Benefits of Air Layering:
Air layering is advantageous for plants that are challenging to propagate through other means, such as certain woody shrubs or trees. It facilitates root growth in a controlled environment and increases the chances of successful propagation.
Care and Maintenance
Cleaning and Pruning
Proper care and maintenance are essential for the health and vitality of your plant cuttings. Here are some tips:
- Cleanliness is key: Regularly remove dead leaves and debris around the base of the cutting to prevent mold and pests.
- Pruning: Trim overgrown or unhealthy parts of the plant to promote new growth and maintain a pleasing shape.
- Tools: Use sharp, clean shears to make precise cuts without damaging the plant.
Watering and Feeding
Proper hydration and nutrition are crucial for the development of strong roots and vibrant foliage:
- Watering: Ensure the soil is consistently moist but not waterlogged. Adjust watering frequency based on the plant’s needs and environmental conditions.
- Feeding: Use a balanced fertilizer to provide essential nutrients for healthy growth. Follow instructions carefully to avoid over-fertilization.
Monitoring Growth
Keep a close eye on the progress of your plant cuttings to address any issues promptly:
“Regularly inspect the leaves, stems, and roots for signs of pests, diseases, or nutrient deficiencies.”
Optimal Environment
Creating the right surroundings for your plant cuttings can make a significant difference in their overall well-being:
- Light: Place the cuttings in a bright location away from direct sunlight to prevent scorching.
- Temperature: Maintain a stable, moderate temperature to encourage healthy growth without extremes.
- Humidity: Provide sufficient humidity by misting the leaves or using a humidifier for delicate species.
Providing Optimal Growing Conditions
Light Requirements
Ensuring adequate light exposure is crucial for the successful growth of plant cuttings. Here are some key points to consider:
- Direct Sunlight: Most plants thrive in indirect sunlight; however, some species require full sun exposure.
- Duration: Aim for at least 6 hours of light per day for optimal growth.
- Placement: Position your cuttings near a south-facing window for the best light exposure.
Temperature and Humidity
Maintaining proper temperature and humidity levels creates a conducive environment for cuttings to root and grow:
- Ideal Temperature: Most plants root well in temperatures around 65-75°F; however, specific species may have different requirements.
- Humidity: Keep the air around the cuttings moderately humid to prevent wilting.
- Misting: Regularly misting the cuttings can help maintain adequate humidity levels.
Soil and Watering
The choice of soil type and proper watering are vital factors in nurturing healthy cuttings:
- Well-Draining Soil: Opt for a well-aerated and drainage-friendly potting mix.
- Rooting Hormone: Consider using a rooting hormone to promote faster root development.
- Watering Frequency: Maintain moist but not soggy soil by watering regularly but sparingly to avoid waterlogging.
Protection and Care
Providing additional care and protection can aid in the successful establishment of plant cuttings:
- Protect from Drafts: Shield cuttings from drafts that can stress the plants.
- Regular Monitoring: Inspect the cuttings frequently for signs of growth or issues that may arise.
- Support: Use stakes or ties to support taller cuttings to prevent breakage.
Monitoring Growth and Progress
Tracking Plant Development
Monitoring the growth of your plants from cuttings is essential to ensure their health and success. Keep a close eye on the following key indicators:
- Root Development: Check for new root growth by gently tugging on the cutting. Resistance indicates root formation.
- Foliage: Observe the leaves for any discoloration, wilting, or growth. Healthy foliage is a sign of successful propagation.
- Growth Rate: Measure the height and overall size of the plant regularly to track its progress.
Documenting Changes
Creating a growth journal can help you track changes over time and identify any issues that may arise. Note down the following details:
- Date of Planting: Record the date when you took the cutting and planted it.
- Environmental Conditions: Note the light, temperature, and humidity levels around the plant.
- Watering and Feeding: Keep track of your watering schedule and any nutrients provided.
Signs of Healthy Growth
Understanding the signs of healthy growth will help you assess the progress of your propagated plants. Look out for these positive indicators:
“Vibrant green leaves, sturdy stems, and visible new growth are all signs that your plant is thriving.”
| Signs of Healthy Growth |
|---|
| Strong Root System |
| Lush Foliage |
| Increased Height |
Troubleshooting Common Issues
1. Yellowing Leaves
Yellowing leaves could indicate overwatering or nutrient deficiency. To troubleshoot:
- Check the soil moisture and adjust watering accordingly.
- Consider using a balanced fertilizer to provide essential nutrients.
2. Wilting or Drooping
Wilting or drooping plants are often a sign of underwatering or root rot. Take these steps:
- Ensure proper drainage to prevent waterlogged soil.
- Water the plant thoroughly, allowing excess water to drain out of the pot.
3. Pests Infestation
Pests can damage plant cuttings. If you notice pests such as aphids or spider mites:
“Introduce natural predators like ladybugs or use neem oil to control the infestation.”
4. Leggy Growth
Leggy growth, with elongated and weak stems, may indicate insufficient light. To address this issue:
- Move the plant to a brighter location with indirect sunlight.
- Consider pruning the leggy parts to encourage a bushier growth.
5. Mold or Fungus
Mold or fungus on cuttings can hinder growth. Follow these steps to combat it:
- Improve air circulation around the plant by spacing cuttings apart.
- Avoid overwatering to reduce excess moisture that fungi thrive in.
Transplanting Rooted Cuttings
Preparing for Transplant
Transplanting rooted cuttings is a delicate process that requires attention to detail and care. Before you begin, make sure to:
- Prepare the Soil: Ensure the soil in the new container is well-draining and nutrient-rich.
- Select the Right Container: Choose a container that is slightly larger than the root system of the cutting.
- Water the Cutting: Give the cutting a thorough watering a day before transplanting to help reduce stress.
The Transplanting Process
Follow these steps to transplant your rooted cuttings successfully:
- Fill the Container: Fill the new container with the prepared soil, leaving enough space for the cutting.
- Make a Hole: Create a hole in the center of the soil large enough to accommodate the root system of the cutting.
- Remove the Cutting: Gently remove the cutting from its current container, being careful not to damage the roots.
- Place the Cutting: Set the cutting into the hole in the new container, ensuring the roots are spread out evenly.
- Fill in Soil: Fill in the space around the cutting with soil, pressing it gently to remove air pockets.
- Water Thoroughly: Give the newly transplanted cutting a generous amount of water to help settle the soil.
Caring for Transplanted Cuttings
After transplanting, it is essential to provide proper care to help the cutting establish itself in its new environment. Remember to:
- Monitor Watering: Keep the soil consistently moist but not waterlogged to promote healthy growth.
- Protect from Direct Sunlight: Shield the cutting from direct sunlight initially to prevent stress.
- Avoid Disturbance: Minimize disturbances around the cutting to allow it to acclimate to its new home.
Steps for Successful Transplanting
Transplanting your plants can be a delicate process that requires attention to detail and care. Follow these steps to ensure a successful transition for your beloved cuttings:
Preparation is Key
- Choose the Right Time: Transplant during the plant’s dormant period for minimal stress.
- Select the Proper Site: Ensure the new location provides the ideal conditions for growth.
- Prepare the Soil: Use well-draining soil with the necessary nutrients for healthy development.
Transplanting Process
- Water the Plant: Hydrate the cutting thoroughly a day before the transplant.
- Remove the Cutting: Gently loosen the soil around the roots to lift the cutting carefully.
- Prepare the New Hole: Dig a hole in the new location, ensuring it’s deep and wide enough for the roots.
- Plant the Cutting: Place the cutting in the hole and cover the roots with soil, pressing gently to secure it.
- Water Again: Give the plant a generous amount of water to help it settle into its new home.
Caring for the Transplanted Cutting
“Nurturing your cuttings post-transplant is crucial for their successful growth.”
- Monitor Moisture: Keep the soil consistently moist but not waterlogged to support root development.
- Protect from Extreme Conditions: Shield the plant from harsh sunlight and strong winds initially.
- Apply Fertilizer: Use a balanced fertilizer sparingly to encourage healthy growth.
Follow these steps diligently to give your plant the best chance at thriving in its new environment.
Hardening off Rooted Cuttings
When your cuttings have successfully rooted, it is essential to follow the proper hardening off process to ensure their successful transition to the outdoor environment. Hardening off helps acclimate plants to the outdoor conditions gradually, reducing the risk of shock and increasing their chances of thriving.
Steps for Hardening Off Rooted Cuttings:
- Choose the Right Time: Select a period with mild weather and avoid extreme temperatures.
- Start Slow: Begin by placing the plants outdoors in a sheltered spot for a few hours each day, gradually increasing the time over a week or two.
- Gradually Increase Exposure: Expose the plants to direct sunlight and natural elements slowly to prevent sunburn or wind damage.
- Monitor Moisture: Ensure the soil stays moist but not waterlogged during the hardening off period.
- Protection from Harsh Conditions: Bring the plants indoors if there are frost warnings or severe weather conditions.
Benefits of Hardening Off:
Hardening off your rooted cuttings is crucial for their long-term health and resilience in the outdoor environment. By following this process diligently, you give your plants the best chance to establish themselves and flourish.
Potting or Transferring to the Garden
Potting Plants from Cuttings
When it’s time to pot your rooted cuttings, follow these steps for a successful transition:
- Choose the Right Pot: Select a clean pot with proper drainage holes to prevent waterlogging.
- Prepare the Potting Mix: Use a well-draining mix of equal parts potting soil and perlite or sand.
- Planting: Make a hole in the center of the potting mix and gently place the cutting, ensuring the roots are covered.
- Watering: Water the cutting thoroughly and place it in a warm, bright location away from direct sunlight.
- Maintenance: Keep the soil moist but not waterlogged and monitor the plant for growth.
Transferring to the Garden
When moving your plants from pots to the garden, consider these essential tips:
- Timing: Choose a cloudy day or evening to minimize transplant shock.
- Preparing the Site: Dig a hole slightly larger than the root ball of the plant and loosen the soil at the bottom.
- Transplanting: Gently remove the plant from the pot, place it in the hole, and backfill with soil.
- Watering: Water the plant immediately after transplanting to help it settle into its new environment.
- Mulching: Apply a layer of mulch around the plant to retain moisture and suppress weeds.
- Care: Monitor the plant closely for the first few weeks and provide adequate water and nutrients as needed.
Advanced Tips and Techniques
Optimizing Growth Through Strategic Propagation
Maximize your plant propagation success by implementing strategic techniques that enhance growth rates and overall plant health.
Utilizing Hormone Treatments for Accelerated Rooting
Explore the benefits of utilizing rooting hormones to catalyze the rooting process and expedite the development of robust root systems.
Implementing Controlled Environments for Cutting Success
Create optimal conditions by controlling factors like humidity, temperature, and light exposure to promote successful root development in cuttings.
Experimenting with Different Substrate Compositions
Discover how varying substrate compositions can impact the rooting process, and learn to choose the most suitable medium for different plant species.
Enhancing Nutrient Uptake for Cutting Establishment
Boost the nutrient uptake efficiency of your cuttings by providing essential elements in appropriate concentrations to support healthy growth.
Monitoring and Managing Disease Risks
Stay vigilant against disease risks that may impede the successful establishment of cuttings, and implement preventive measures to safeguard plant health.
Experimenting with Different Propagation Mediums
When propagating plants from cuttings, the choice of propagation medium plays a crucial role in the success of the process. Experimenting with different mediums can help you determine which works best for the specific plants you are propagating.
Types of Propagation Mediums to Consider
- Water: Placing cuttings in water is a common method that works well for many plant varieties.
- Soil: Using a well-draining soil mix is suitable for plants that root easily in soil.
- Vermiculite: This medium provides excellent aeration and moisture retention, ideal for sensitive cuttings.
- Perlite: Lightweight and porous, perlite promotes root growth and prevents waterlogging.
Factors to Consider When Choosing a Medium
- Plant Type: Some plants prefer certain mediums over others due to their specific moisture and aeration needs.
- Watering Needs: Consider the watering requirements of the plant and choose a medium that can maintain the right moisture level.
- Risk of Rot: Some mediums may retain too much moisture, increasing the risk of rot in certain plant species.
- Aeration: Adequate aeration is essential for root development, so choose a medium that provides good airflow.
Quoting Expert Advice
“Experimenting with different propagation mediums is a valuable way to learn what works best for your plants. Pay attention to how each medium affects root development and overall growth.”
Enhancing Root Development
Enhancing root development is crucial for the successful propagation of plants from cuttings. By understanding how roots grow and providing the ideal conditions, you can ensure the health and vitality of your new plants.
Optimal Rooting Environment
- Moisture: Keep the rooting medium consistently moist but not waterlogged to encourage root growth.
- Aeration: Good airflow around the cuttings is essential for root development. Avoid overly compacted soils.
- Temperature: Maintain a stable temperature around the cuttings for optimal root growth. Most plants root best in slightly warmer conditions.
Rooting Hormones
Using rooting hormones can significantly enhance the development of roots on your cuttings. These natural or synthetic substances stimulate root growth and can increase the success rate of propagation.
Patience and Monitoring
“Roots are not seen, but they are the foundation that sustains growth.”
Patience is key when propagating plants from cuttings. Monitor the progress of root development regularly without disturbing the cuttings excessively.
Propagation Tools
- Sharp Blade: A clean, sharp blade for taking cuttings ensures a clean cut that promotes healthy root development.
- Rooting Tray: Use a rooting tray or container with drainage holes to provide the right conditions for root growth.
Watering Techniques
Water the cuttings gently and evenly to maintain the moisture levels in the rooting medium. Over-watering can lead to rot, while under-watering can hinder root growth.
Scaling up your propagation efforts
Expanding Your Plant Propagation
When looking to scale up your propagation efforts, it’s crucial to establish a well-thought-out plan to ensure success. Here are some key points to consider:
- Diverse Selection: Ensure you choose a variety of plants to propagate, creating a diverse collection. This adds interest and prevents the risk of losing an entire species due to unforeseen circumstances.
- Effective System: Develop an efficient propagation system that can accommodate a larger scale. This may involve investing in more equipment, space, or tools to streamline the process.
Batch Propagation Approach
Adopting a batch propagation approach can significantly increase your efficiency and productivity when propagating plants. By grouping plants into batches based on their needs, you can streamline the process and reduce time and effort wastage.
Automation and Technology
Integrating automation and technology into your propagation efforts can revolutionize the way you grow plants from cuttings. Consider using tools such as automated misting systems, grow lights, or temperature controllers to optimize conditions for successful propagation.
Conclusion
As we wrap up our journey into the world of growing plants from cuttings, let’s reflect on the key takeaways and important insights we’ve gained along the way. The process of propagating plants through cuttings is indeed a fascinating and rewarding experience that opens up a realm of possibilities for plant lovers. By honing your skills and knowledge in this art form, you can witness the miracles of growth and nurture life in your own hands.
Summary of Learnings
- Patience is Key: Growing plants from cuttings requires patience and dedication.
- Proper Techniques: Mastering the right cutting techniques is crucial for successful propagation.
- Environmental Factors: Understanding the impact of light, temperature, and humidity on plant growth is essential.
- Nurturing Care: Providing the right care and attention to your cuttings will nurture them into thriving plants.
Embrace the Journey
Remember, every cutting tells a story of resilience and growth. Embrace the journey of tending to these delicate starts and witnessing them flourish into flourishing plants. Your efforts in propagating plants from cuttings not only expand your green family but also deepen your connection to the natural world.
Continued Exploration
As you continue on your gardening endeavors, keep exploring new plant species, experimenting with different propagation methods, and sharing your knowledge with fellow plant enthusiasts. The world of plants is vast and ever-inspiring, offering endless opportunities for learning and growth.
Celebrating your successful plant propagation journey
Reflections on Progress
As you reflect on your plant propagation journey, take a moment to celebrate how far you have come. Each successful root formed and new plant established is a testament to your dedication and expertise.
Sharing the Joy
Share your achievements with fellow plant enthusiasts and inspire them to embark on their propagation ventures. Your collaborative spirit can foster a community that thrives on learning and growth.
Acknowledging Challenges
Remember the setbacks and challenges you faced along the way. These moments of struggle have nurtured your resilience and deepened your understanding of plant care.
Cultivating Future Success
Look to the future with optimism and curiosity. Every cutting holds the potential for a new plant, representing endless possibilities for growth and beauty.
Sharing your newfound knowledge and plants with others
As you delve into the art of propagating plants from cuttings and witness your green companions flourish, you might feel compelled to share both your newfound knowledge and the plants themselves with others. Building a community around your passion for plants can be rewarding and enriching for everyone involved.
Sharing Tips and Tricks
When sharing your knowledge with others, remember that patience and attention to detail are key. Offer guidance on selecting the right cuttings, nurturing them, and troubleshooting common issues. Encourage others to experiment and learn from their experiences.
Building a Plant Swap Network
Consider organizing or participating in plant swap events where fellow plant enthusiasts can exchange cuttings, tips, and stories. These gatherings create a sense of camaraderie and provide opportunities to expand your collection with new and diverse plant species.
Teaching Workshops
If you feel confident in your propagation skills, hosting workshops can be a fulfilling way to impart your knowledge to a broader audience. Structure your workshops to cater to both beginners and experienced gardeners, offering hands-on demonstrations and interactive sessions.
Frequently Asked Questions
How do I ensure the cuttings I share with others survive? Provide detailed instructions on care, including watering schedules, light requirements, and the importance of a nurturing environment. What are some creative ways to package and gift plant cuttings? Consider using eco-friendly materials like recycled paper or fabric, and include personalized care instructions for that extra touch. How can I connect with a plant-loving community in my area? Join local gardening clubs, attend plant swap meets, or engage with online forums and social media groups dedicated to plant propagation.